|
Tinctures are a way to support your health that is outside of the corporate, capitalist, pharmaceutical industry. As a person who has had some very bad experiences with western health care, and as someone who has totally annihilated my gut flora because of chronic strep throat and inappropriate prescription of antibiotics (wrong strains, wrong regimens, wrong application, etc), I prefer to make my own medicine. Making natural medicine has caused me to look inward and tuned me into the state of my body. It has helped me gain a sense of empowerment and autonomy. That said, if I had an illness that required one-dimensional treatment like a terrible infection, acute pain, or surgery, of course I would take whatever treatments would be effective. Remember that it is up to you to determine what works for you. Even when western medical doctors say it a treatment is imperative, remember that your body and life are your own and understand the consequences of your choices. If making natural medicine is something you think will empower you and help attune you to your body, all I can say is, I feel it works very well for me and have heard the same from many others. There is nothing like the intimacy of collecting your own plants for medicine , eating them for their nutritional healing properties, and studying them and preparing them for acute situations and ongoing support. I would argue that this is a spiritual connection that cannot be fostered through mainstream western medicine and if your ailment is spiritual, this process is what will heal you. However, also remember that dogma can kill you - I don't recommend sticking to your guns for the simple principle of it. Be honest when you're in over your head and take help when it's helpful. 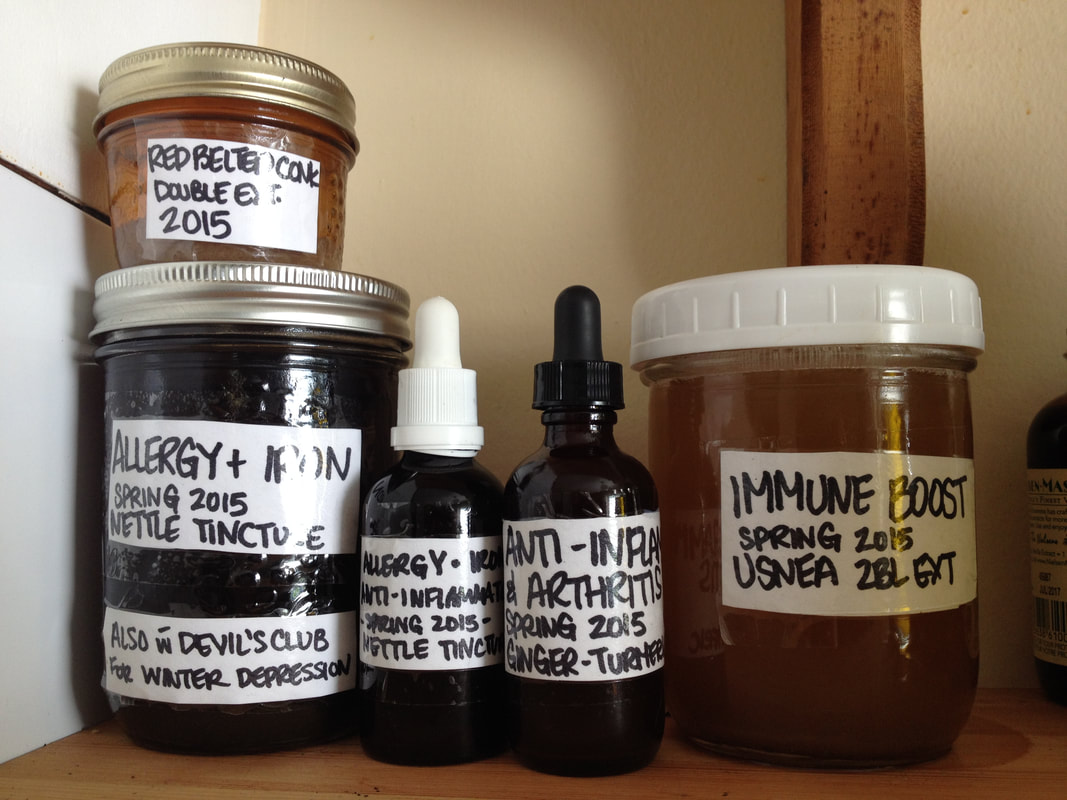 There is a wealth of information on the internet about making tinctures so it's easy to learn. However, before I delve into the process I want to mention a few things. 1) Make sure you understand your herb. Some herbs, like stinging nettle, are safe and helpful to take everyday while others like turkey tail are immune stimulators so may not be the right application for autoimmune disorders. If you are preparing a tincture of cottonwood buds for propolis, remember that it is antibacterial and behaves like an antibiotic so don't take this stuff everyday! Read up, share, study! 2) Ask Permission. This is the spiritual part of natural medicine and was taught to me by an Indigenous Warrior Woman. I didn't really understand how important it was until I noticed its effects. Medicines I have made from plants who came unwillingly have tasted ungodly, gone a strange black colour, or seemed less effective. Try to perceive the condition of the plants you are harvesting and ask their permission. If they scratch, make you feel paranoid, or fall apart this may be a sign to leave them be. If you need them I think the herb's generosity will abound. 3) If you are collecting your own herbs, make sure of their identification. I know a woman from wildcrafting school who thought she was making an Angelica tea for her cramps. Instead, she poisoned herself and nearly died because she made a decoction of poison water hemlock. If you're not a plant ID expert, be safe and grow your own herbs to harvest or purchase them from a trusted source. 4) Be mindful of botulism. This is really important. All the fuss about pop-top lids, acidity and salt levels, is all to prevent botulism sporulation. Here is information on botulism and how to safeguard against it when you are canning. For alcohol tinctures, remember that botulism can sporulate in a mark (the liquid used to extract the herb) that is under 25% ABV. Be mindful of this when using fresh herbs and fungi, as they contain water! To be entirely safe, if you're using fresh herbs, don't bother adding any water to your 40% alcohol. And now, finally... 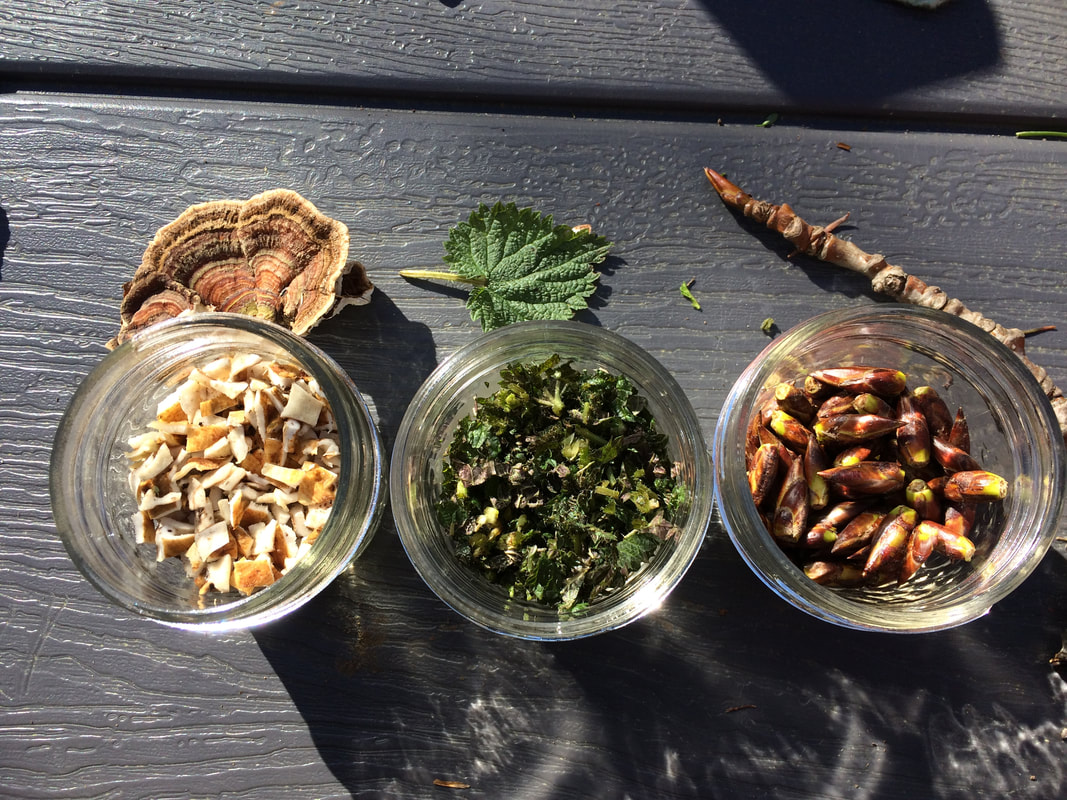 how to make an alcohol tinctureThis is a basic recipe using 40% grain alcohol (vodka). For harder herbs with resinous constituents, a higher proof alcohol like Everclear could be useful, as could the application of heat in either a water decoction, or warm oil or glycerin extraction. Some extractions can even be made with vinegar because acid will pull out different things than heat, water (tea/decoction), fat (oil/glycerin), alcohol (vodka/everclear), or salt. For now, let's keep it simple and do 3 tinctures with vodka and herbs that are in season right now: Turkey Tail Fungus, Stinging Nettle, and Cottonwood Buds (Propolis). I've done the measurements in ratios to fit into any container. I usually use small mason jars.
THE PROCESS varies but Step 1 is always the same: LABEL AND DATE IMMEDIATELY!
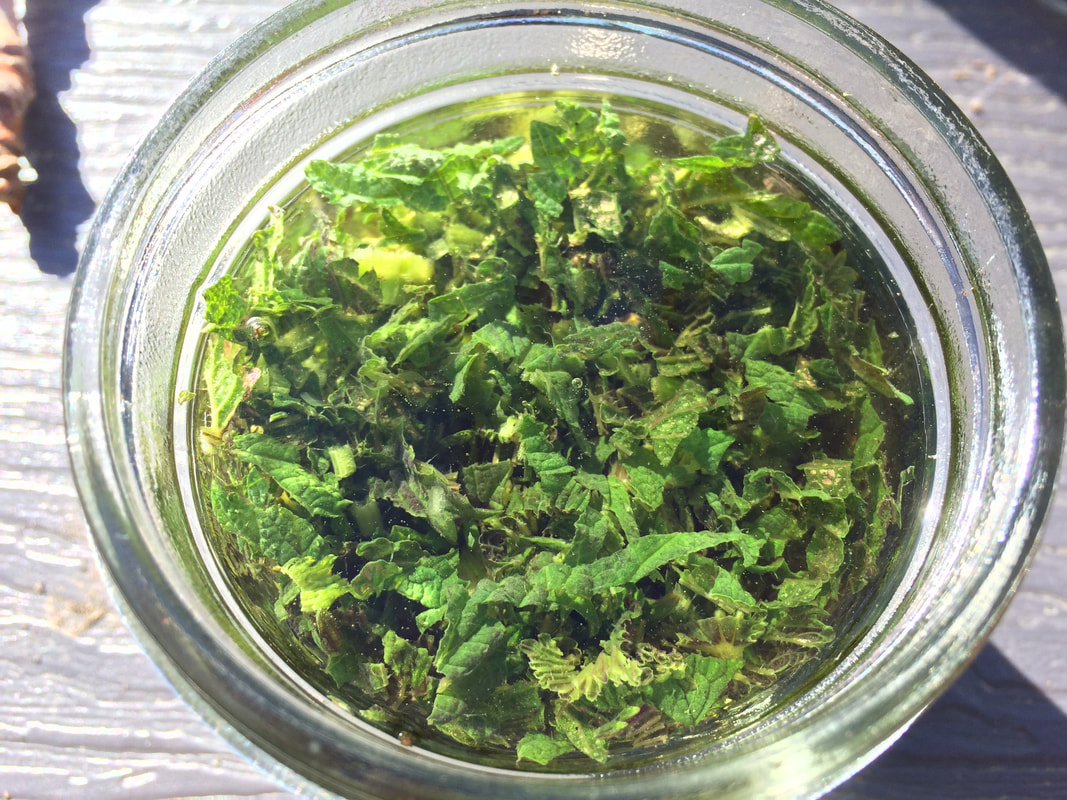
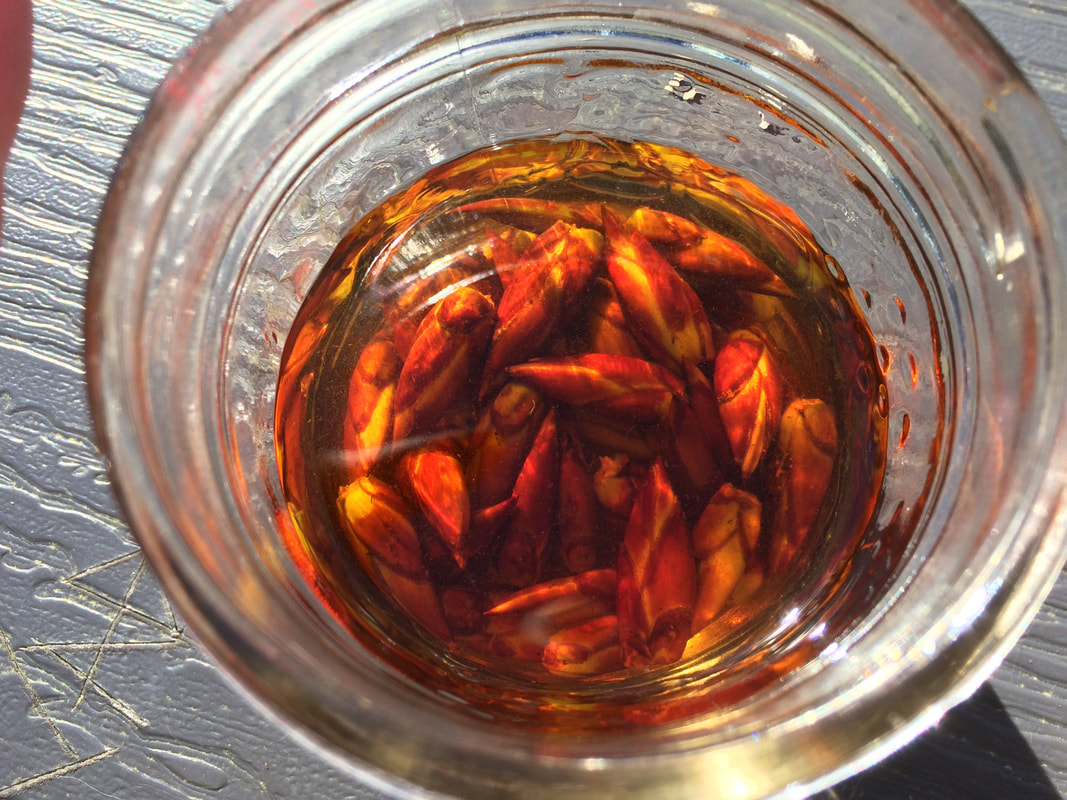
Step 2: Macerate For fresh, leafy herbs like fresh nettles, you only need 48 hours to extract. Any longer and it could 'cook' your menstruum and that tastes yucky. For dried herb, roots, resinous buds (Cottonwood) or tough fungi like Turkey Tail, 8 weeks in a cool, dark place will do. Agitating daily will help the alcohol get into hard to reach places but don't sweat it if you forget. Step 3: Strain For fresh nettle tincture, strain your greens out after 48 hours and bottle in a dropper. For dried Nettle, the Cottonwood Buds, and fresh/dried Turkey Tail, strain after 8-10 weeks into their applicators. I like Turkey Tail tincture in a dropper and Cottonwood Propolis in a spray bottle to spray onto sore throats or wounds. Step 4: Label, Date, and Store Label and Date your alcohol tinctures in their new applicator containers. Alcohol tinctures can stay viable for up to 6 years if stored in a cool, dark place. Treatment: This depends entirely on what you are trying to treat. I recommend a good herb book (not necessarily the internet) for this stuff. My personal treatments involve: -1 dropperful of nettle tincture daily for allergies and iron -3 X dropperfulls of turkey tail for acute treatments of an immunity nature (feeling run down) -2 spritzes, 3 X per day of my "throat spray" at the back of my mouth for sore throats. **Throat spray is a spray bottle filled with 35 ml of cottonwood tincture, 10 ml devil's club tincture, and 5 drops of wild oregano oil. Only use this one for acute treatment because it is antibiotic. 'Booch is what I call Kombucha. I love this shit because it's volatile, inconsistent, explosive, and sweet-tart, just like me. Kombucha is a living culture -- specifically, it is a sparkling, fermented tea made possible by a Symbiotic Culture of Bacteria and Yeast (henceforth known as a SCOBY). SCOBYs are an ancient and very weird culture that humans have been consuming for the benefit of their enjoyment and gut flora for centuries. From what I've researched, its origins are in China, however I'm sure many cultures who enjoy caffeinated tea made their own ancestral versions. Kombucha is made through a fermentation process, which means it takes days, although it is relatively simple. The number of days depends on the season and weather because temperature affects how quickly sugars can be consumed by yeast. This means the 'Booch recipe is another that will require you to invoke your intuition (sorry). Really, though- fermentation, baking, cooking, and tasting is all a process of intuition and sensation. It's a process of learning to trust yourself and feel confident about what you like. For oversimplified / general steps, just scroll to the bottom of the page. 'booch - the recipe
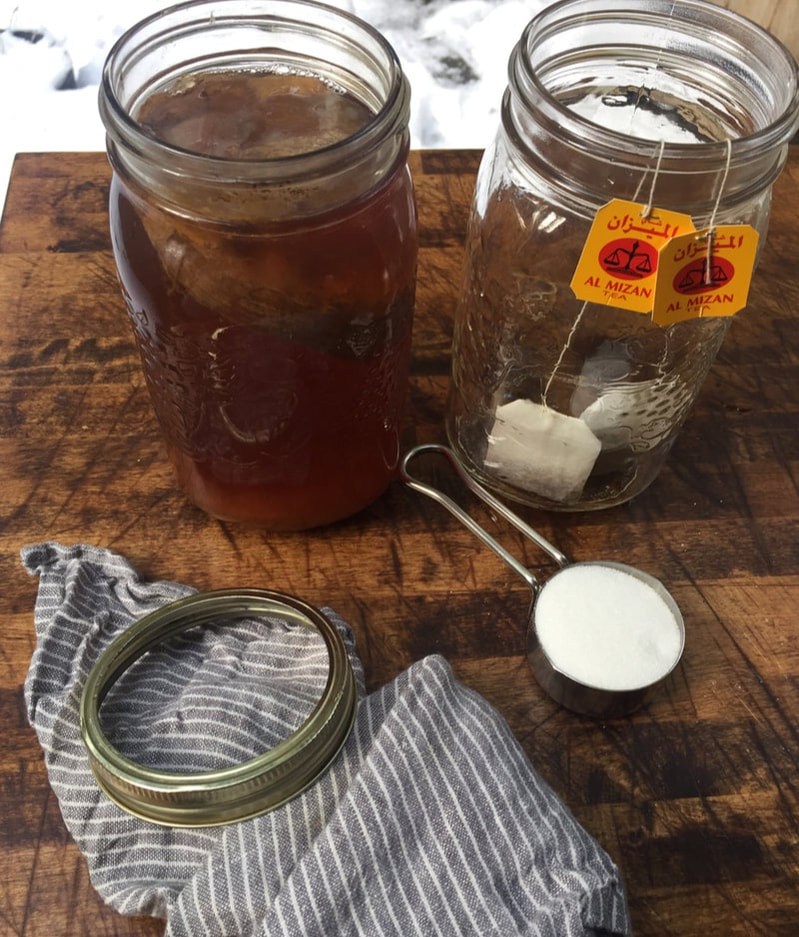
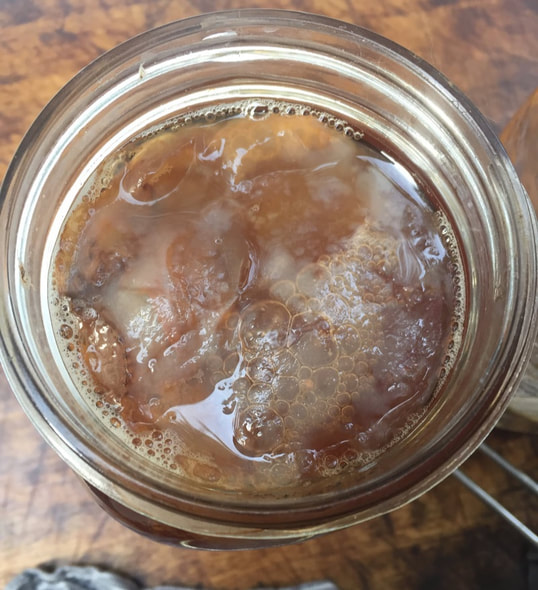
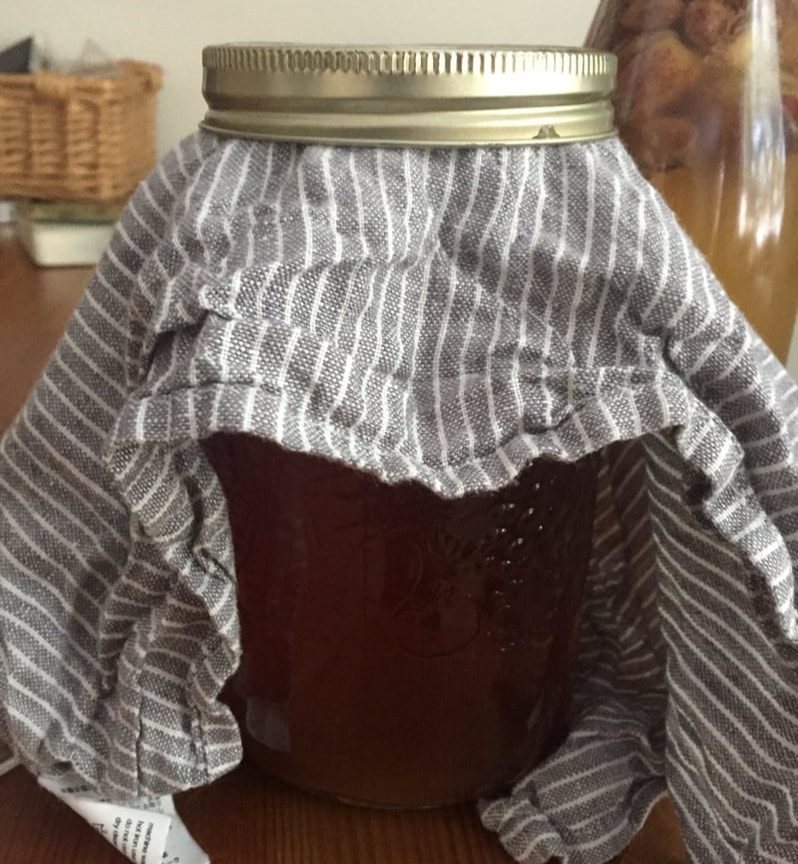
*you must use real 'sugar' (not stevia) that contains glucose because the SCOBY needs to consume this to survive and make kombucha. Very little residual sugar remains in the finished product. PROCESS This depends on how you are starting. If you have received a Scoby and a splash of starter liquid from a friend, that's great. If not, you can make your own with GT's or another Raw Kombucha - just drink half of the container and leave it open on your counter. In about a week it will develop a SCOBY and you'll be able to start making your own. Primary Fermentation I use a sterilized (I wash in the dishwasher), large, glass mason jar. You can use any size jar that will suit your needs, just don't use a 'reactive' container made of material that will leach - so no: metal, ceramic, plastic, or any porous material. Pop your tea bags into your jar. Boil some water and pour over the teabags, filling the mason jar about 3/4 of the way. Allow to steep 10 minutes, remove the tea bags, and pour in 1/4 cup of sugar. Stir, taking care not to whack/crack the glass jar. The residual warmth of the tea will help to dissolve the sugar crystals. Cool to room temperature. Make sure that your tea is completely cooled and add your Scoby plus a splash of its mother liquid. I have noticed if I add the Scoby too early my kombucha ends up tasting sulphurous, which I find positively revolting. Cover the jar with a porous material like a cloth and fasten either with a mason jar ring or an elastic. Store in a cool, dark place (like inside a cupboard) and ferment it until you think it tastes good and a fresh layer of Scoby (a baby!) develops. Depending on the temperature this could take 3 to 10 days. Hint: If you want to speed up the process store your kombucha above the stove or fridge where it's warmer.
Second Fermentation When your kombucha tastes good it is ready to drink. However, if you like flavoured or really bubbly 'booch, then I recommend a second fermentation. By bottling kombucha and encouraging it to ferment again with the addition of something sweet, you'll trap gas in the bottle. This gas becomes suspended in the kombucha and creates a carbonated effect. To do this, pour your finished kombucha from the jar into a bottle with a pop-top (like an old Prosecco bottle). Add a little of something sweet - like a date, piece of fruit (avoid citrus), ginger, or straight-up sweetener. This is also the time to add any spices or flavourings. I love ginger and blueberry, especially if I'm using a green tea. Fasten the lid and allow to ferment at room temperature until desired carbonation is achieved (in my experience it's about 3 days for black tea and a little longer for green).
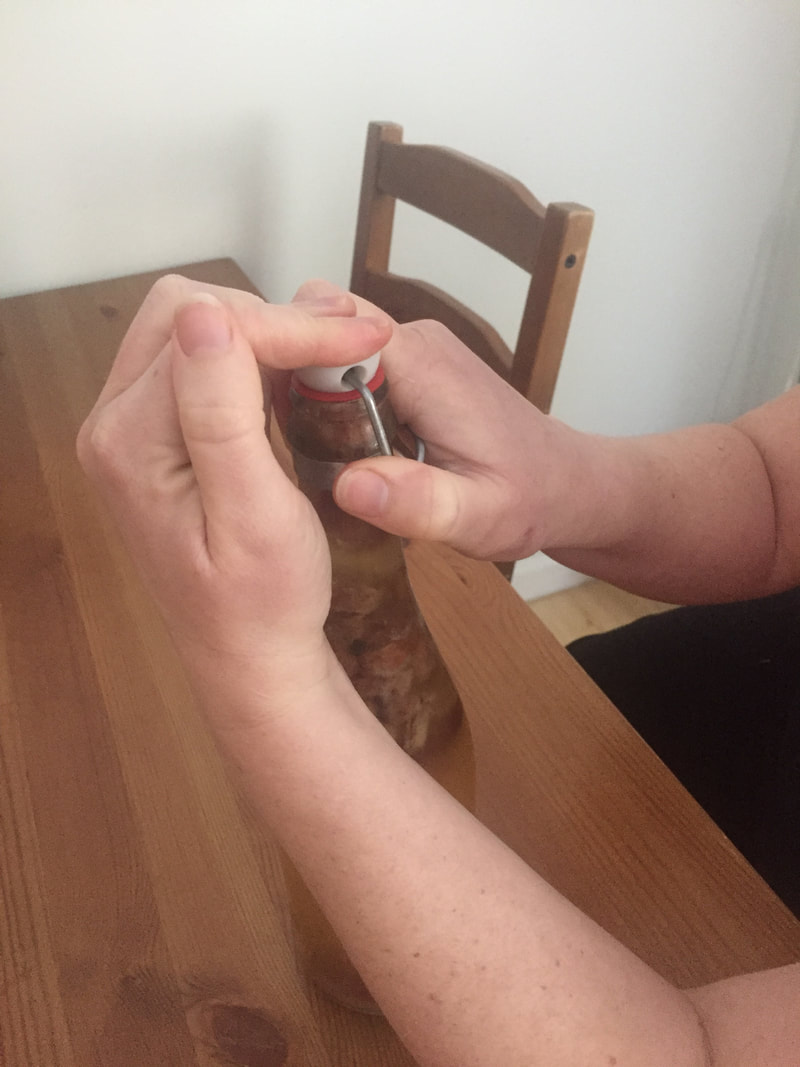
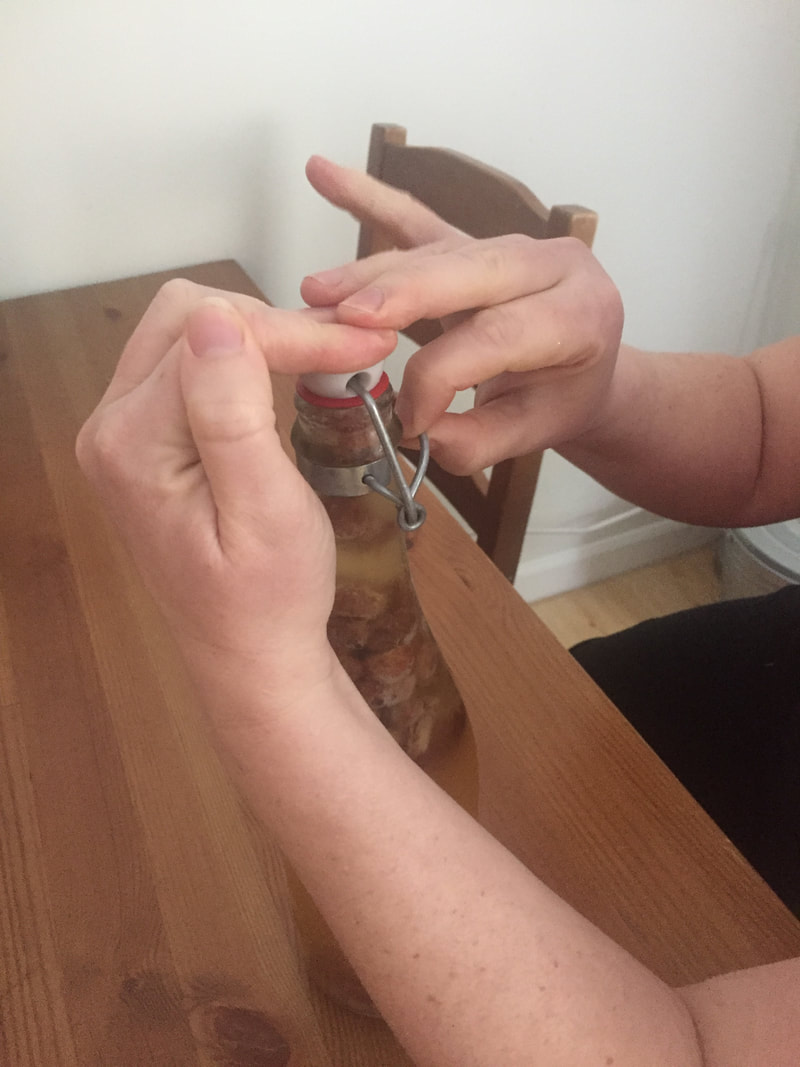
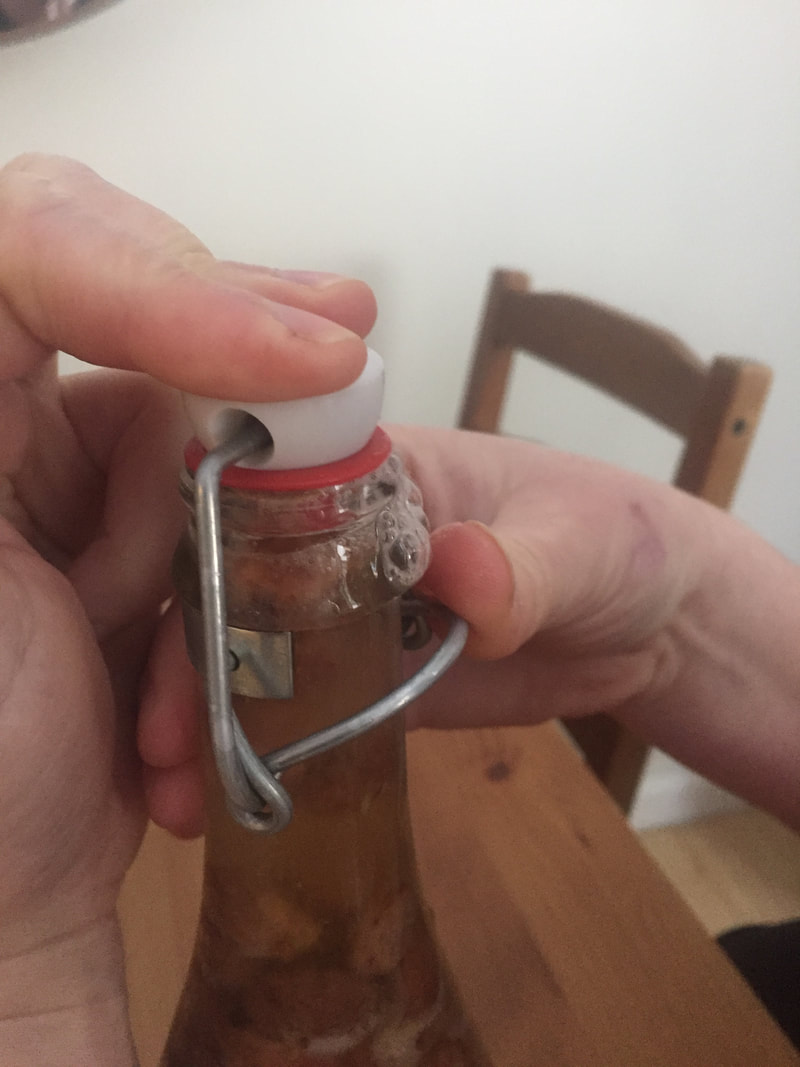
BURPING IS IMPORTANT! If you are using glass bottles, make sure you 'burp' them every day to release excess gas while your kombucha ferments at room temperature. To do this, you need two hands - one to hold the lid down while another releases the fasten. With the metal fasten undone, use your one hand to slowly allow gas to escape by gently easing pressure on the lid. Keep your other hand prepared to quickly fasten the metal brace if the kombucha threatens to overflow. Remember, these two hands could belong to you or -- one could be yours and the other, a helper's. If you forget to burp your bottles, the kombucha may end up exploding the glass which is a dangerous situation. To be on the safer side, you can use old plastic pop bottles with screw caps - they could still explode if you don't burp them but they won't lead to broken glass. I just hate plastic so avoid it at all costs. I have never broken a bottle, but I have had sky-high, explosive 'booch as a result of forgetting to burp it, so try not to forget! Gas can also build up if you have been storing your kombucha in the fridge - this mostly occurs if you've left it a week or more without popping its top. That's why it's good to date your kombucha and remember that anything that has been fastened for a week or longer should be opened slowly, with the burping method.  Kombucha that really wants to pop its top. Dates are especially good at creating effervescence KOMBUCHA VINEGAR If you forget about your kombucha, chances are the Scoby will start to form a bigger 'mothership' (a really fat Scoby) and the liquid will become incredibly acidic. I use this liquid as a vinegar in dressings, soups, cocktails, and for cleaning - it is naturally sour and can actually work to biochemically fight bad bacteria. I've heard of some people using it in their 'fire cider' to kill illnesses and to clean their hair instead of Apple Cider Vinegar, too, but I have never done that myself. In any case, kombucha vinegar is tasty, homemade, and an alternative to buying citrus from faraway lands. 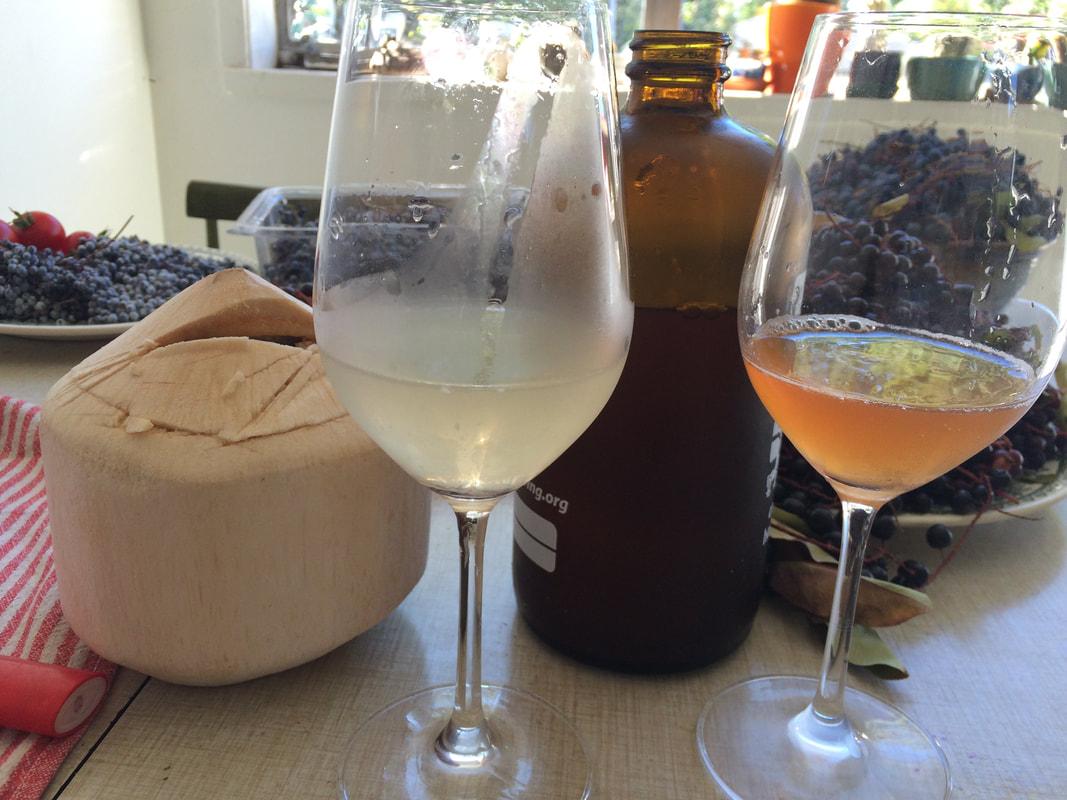 OTHER FERMENTED SODAS Yes, just like kombucha, you can make fermented sodas from other sources. This can be done with things like the natural yeast occurring on fruit plus sugar; with water kefir; coconut water; milk kefir -- even something as simple as dates suspended in water in a bottle will make a soda. The thing to remember is that any fermentation process with sugar and yeast will yield alcohol, so many of these sodas will be slightly alcoholic (like 1%). basic 'booch steps1) make a caffeinated tea, add sugar, cool
2) add a scoby 3) ferment at room temp until tastes good (3-10 days) 4) to make bubbles put in a pop-top bottle and add something containing sugar 5) ferment on the counter, burp the bottle daily (3ish days) 6) refrigerate when its good and bubbly 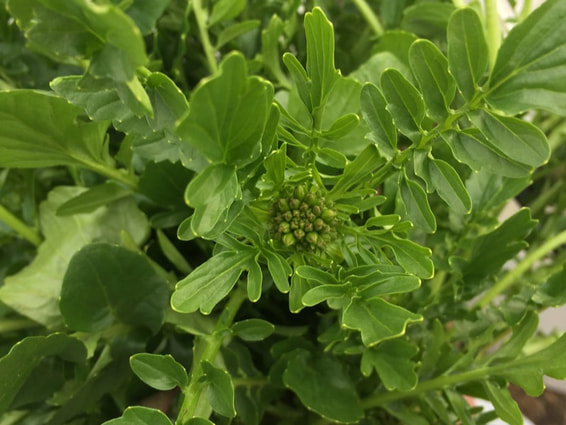 Kingdom: Plantae Order: Brassicales Family: Brassicaceae Genus: Barbarea Species: Vulgaris, Common Names This intensely pungent wild rocket is a wonderful addition to salads and blended into salsa verde. It can be fermented nicely to bring up its nutty flavour and calm its horseradish sensibility. I have collected something of a twin version that is painfully bitter with an eye-watering mothball aftertaste, so sample a piece before committing to a large harvest. It does have many relatives in the same genus that taste and look very similar - none that I know of have been reported with any toxicity. Because this plant is very pungent it can cause acid reflux if eaten in quantity. The leaves can be a little waxy which serves to protect the foliage of this plant through the winter. Collect as soon as it begins to build its rosette in February and continue through to early summer when its flowers make a beautiful addition to salads. Because Wintercress loves disturbed areas, be mindful of pollution and abuse as it can accumulate heavy metals as it functions to remediate the land. Key Features: Lacy, pinnate leaves, Yellow four-petaled flowers, growing in disturbed and flooded land. Edible Parts: All parts of this plant are edible, though the stem can grow woody as it matures. Use as you would arugula, keeping in mind that winter cress is much more pungent. I love it with meat as a horseradish substitute. 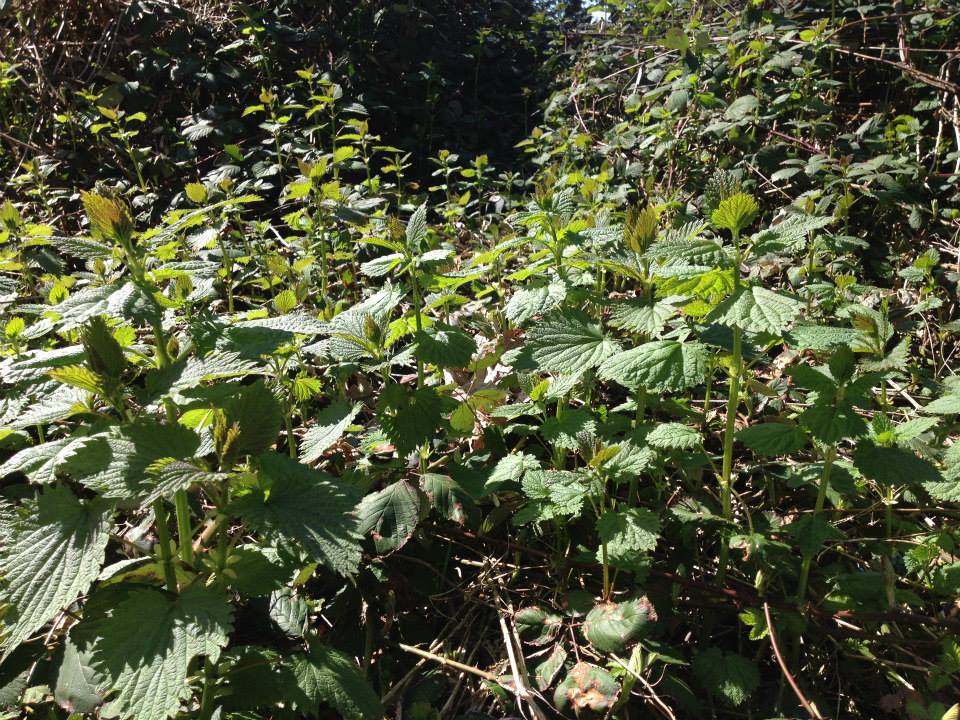 Kingdom: Plantae Family: Urticaceae Genus: Urtica Species: Dioica Common Name: Stinging Nettle, Nettle
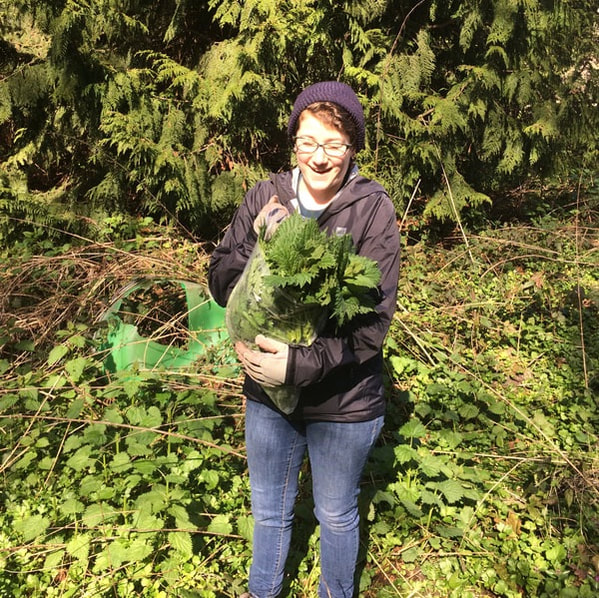
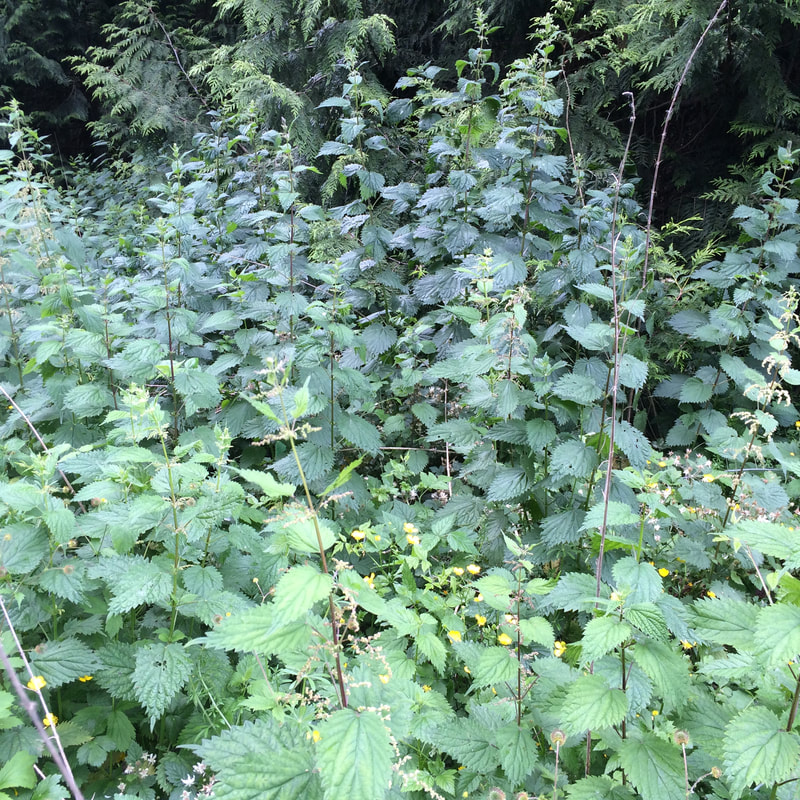
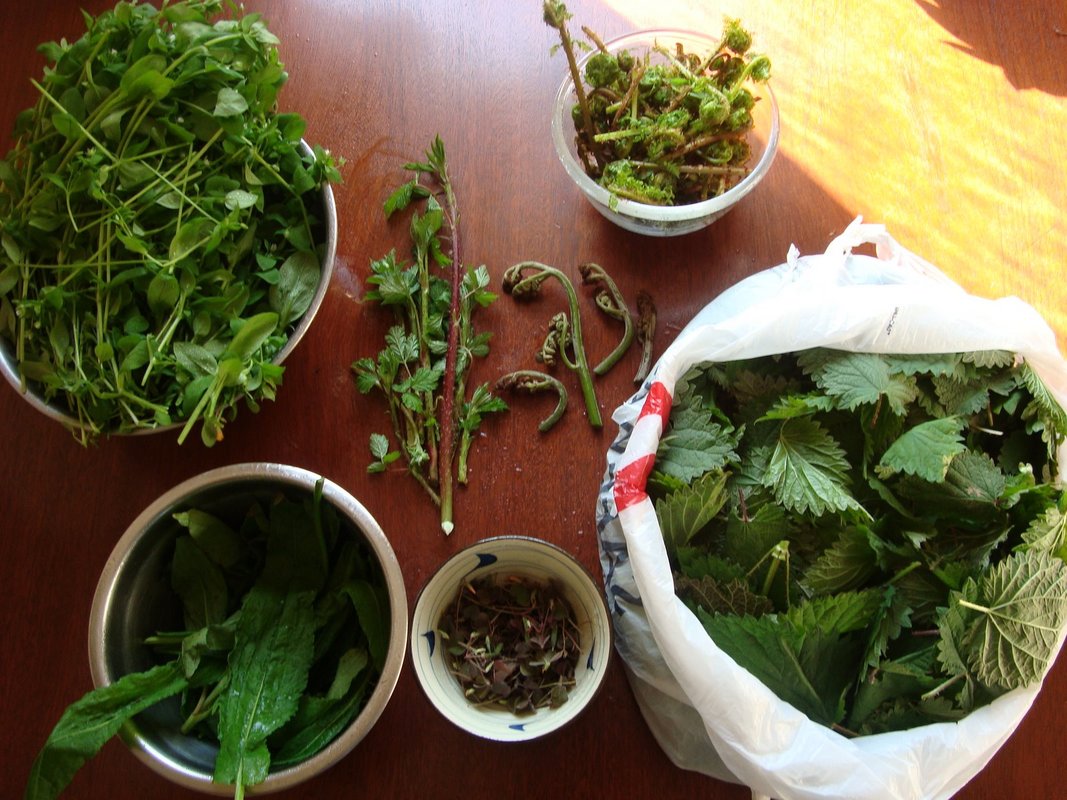
Growing up, I remember being warned that it was a dangerous and pesky weed and witnessed Nettle being vehemently mowed down. I also remember a friend of my dad's - much his elder - noting that because of the removal of nettles by Municipal Workers, a vulnerable population of moths on Vancouver Island had nearly disappeared. Indeed, this plant is an incredible source of nutrition not only for people, but also other plants (they share their nutrients), animals, and insects. When I collect nettles early in the spring or late winter (right now it's the perfect time!), I snip or break the tops 1/3 of the young plants. This encourages them to re-grow and develop more heads and increase the possibility of flower production and seeding. They are a vigorous grower and can populate large spans of land, but heed their growth cycle and remember that you are not the only organism that enjoys or in fact needs this plant for survival. Pictured in the first picture below are nettles in their flowering stage - avoid collecting leaves during this stage of growth because their mineral components become hard for human liver to break down. After the flowers are pollinated, the develop tiny seeds which are nutritious and useful in tinctures. The second photo features other plants that are in season at same time as nettles later in the spring - chickweed, lady ferns, salmon berry shoots, bracken fern shoots, curly dock leaves and shoots, and common oxalis.
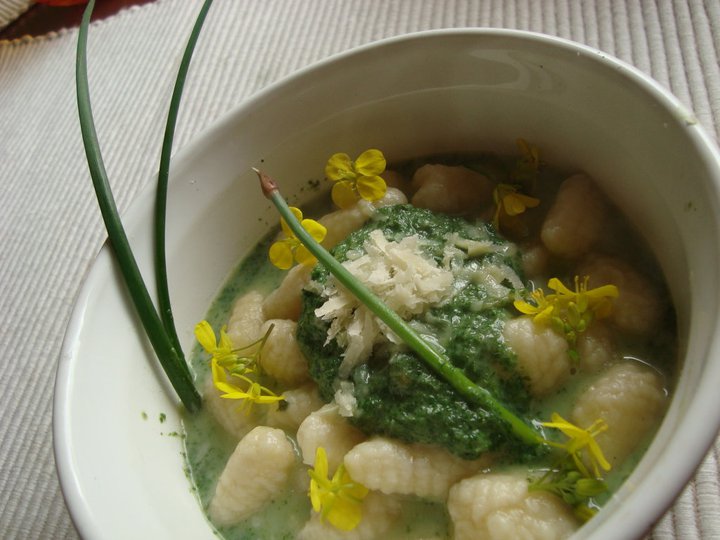
The last photo is a dish I posted on my old blog, consisting of ricotta gnocchi and creamed nettles.
I often see these weird pointy cones wrapped in cellophane and sometimes framed by an annoying styrofoam plate. They remind me of Dan Akroyd and that awkward alien sex scene I accidentally witnessed when I was too young, and also really bad raspberry dressing with chunks of processed blue cheese (omg 1990 was not good to the Endive). My point is, the Endive is a queer ingredient. And the memories it invokes are purely awkward, queer, weirdness... and it's not bad. It's just... queer. 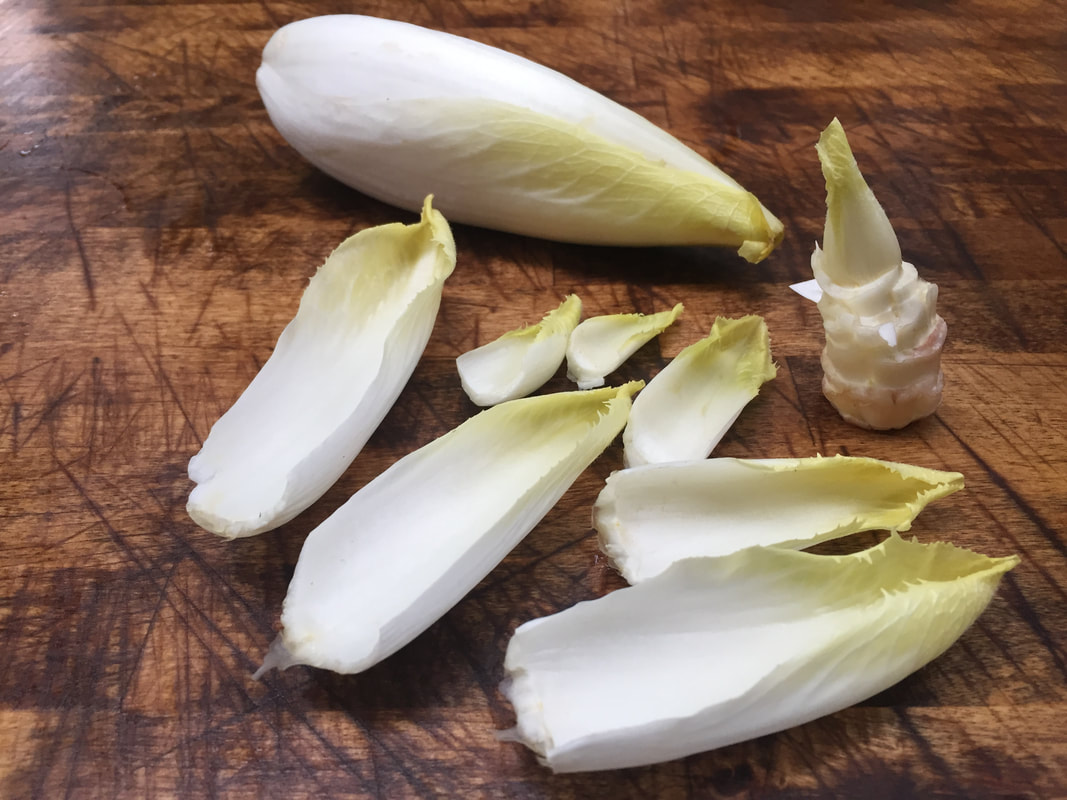 To be fair, this cone-headed vegetable is delicious. Endives are crunchy, sweet, and tender. Individual leaves are perfect little boats for all sorts of lovely mousses and seasonal morsels and dressings and cheeses... actually, they are like little love boats... (Maybe that cone head movie is actually super romantic? I dunno, I've had a couple glasses of wine and feeling really emotional rn) Endives are actually a species of Chicory, which is a group of plants that is found in most parts of the world. This particular species is best as a winter vegetable. I used to think its seasonal and local availability was why it might be a little pricey, but after I did some research I realized the price point is not only because of its availability, but also because Endives are a creative and weird, weird, weirrrrddd thing to produce. They're kind of like the foie gras of lettuce, minus any cruelty. According to Rodale's Organic Life, this is how you grow an endive (paraphrased though queer nostalgia and red wine): ...sow seeds outdoors in late spring in loose soil [...] Dig up the roots in fall, and cut off the tops 2 inches above the crown. Trim the roots and set them upright in boxes, deep pots, or a plastic 5-gallon bucket. Fill the containers with potting mix to the tops of the roots; add 6 to 8 inches of sand on top of that (wtf who has that much sand, ever). Set the pots in your fucking closet or in another spot where the temperature stays between 60° and 70°F. don't forget to water it, obvs. Harvest the heads (teehee) when their tips (hehehe) peek (heh) up through the sand. So basically, you take these roots out of the ground when they are already producing normal greens that are bitter. To make them not-bitter, and strangely delicious, repot them in a big bin or something and cover them with sand. Hide them indoors and don't forget about them. Eventually these chicory roots will produce tight, coney clusters of joy and love. Apparently this technique was popularized in Belgium, hence the name Belgian Endive, although, of course, wasn't initially discovered by a white dude named Jan because other parts of the world were far ahead in their culinary adventures (see: Indonesia, Egypt, et al). No, I won't call it 'White Gold,' thanks. I'm going to try doing this with my red varieties of chicory for a light red or pink version of an Endive. You can actually do the same thing with asparagus to get that weird 'white' asparagus that has no flavour and less nutrition, which seems silly to me, but apparently royalty enjoys that kinda shit so if you have that kind of a sparkly crown, go for it. That good ol' nugget, HuffPost has a bunch of recipes for endives if you're interested. Anyway, endives are cool, and they are a true winter delicacy and available locally or you could try to grow them if you're really keen or whatever. this is a post that I end in a question mark, maybe. (?) 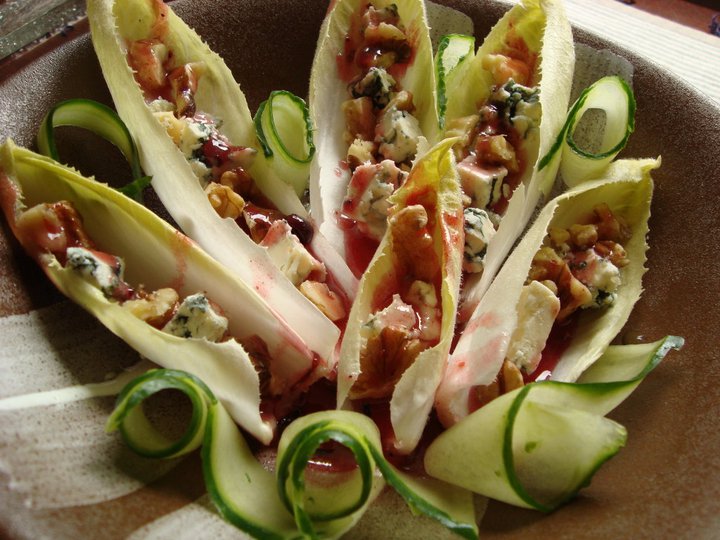 |
Camilleforest brat, plant muncher, mushroom dweller Search(scroll down after searching to skip the ads)
Archives
October 2019
Categories |

 RSS Feed
