|
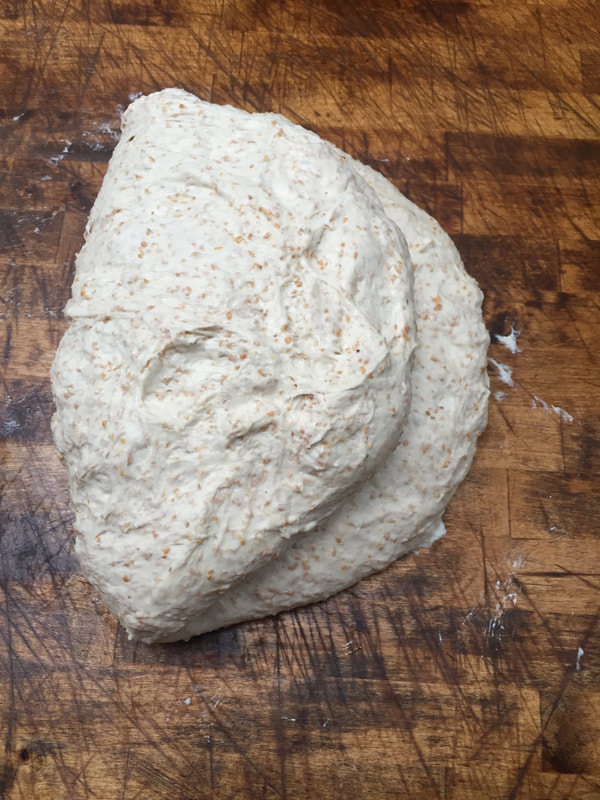
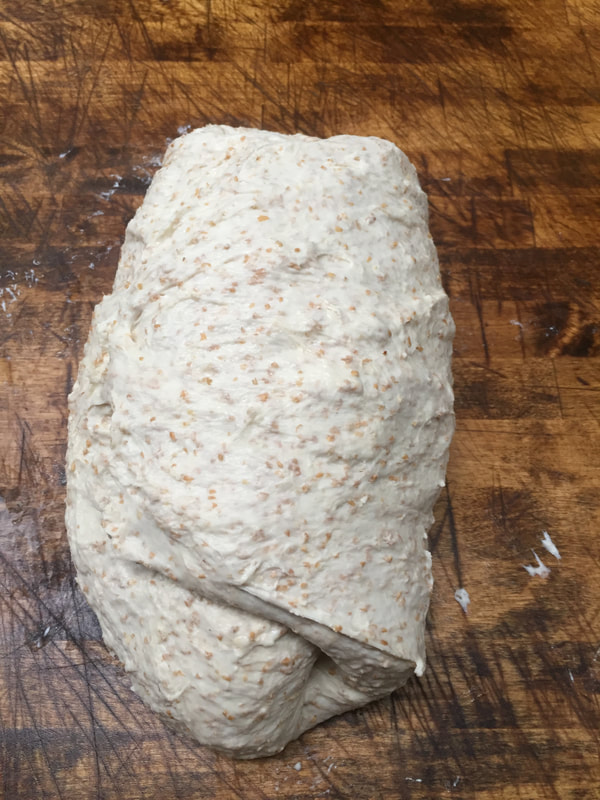
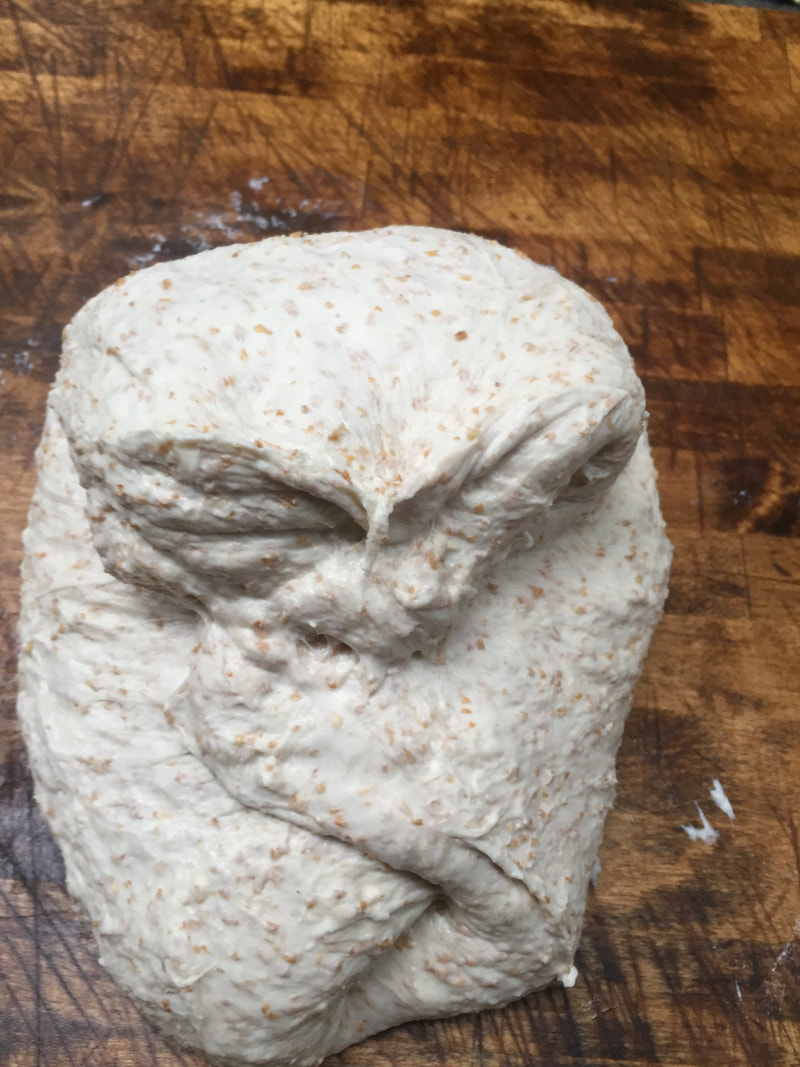
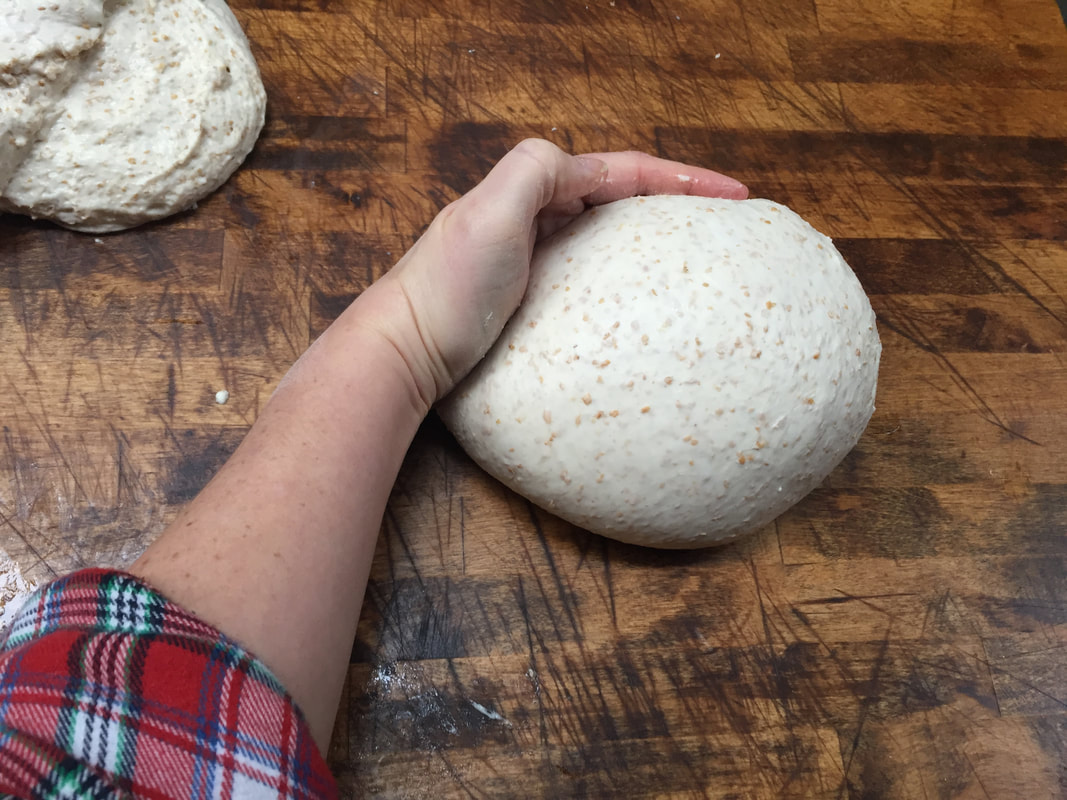
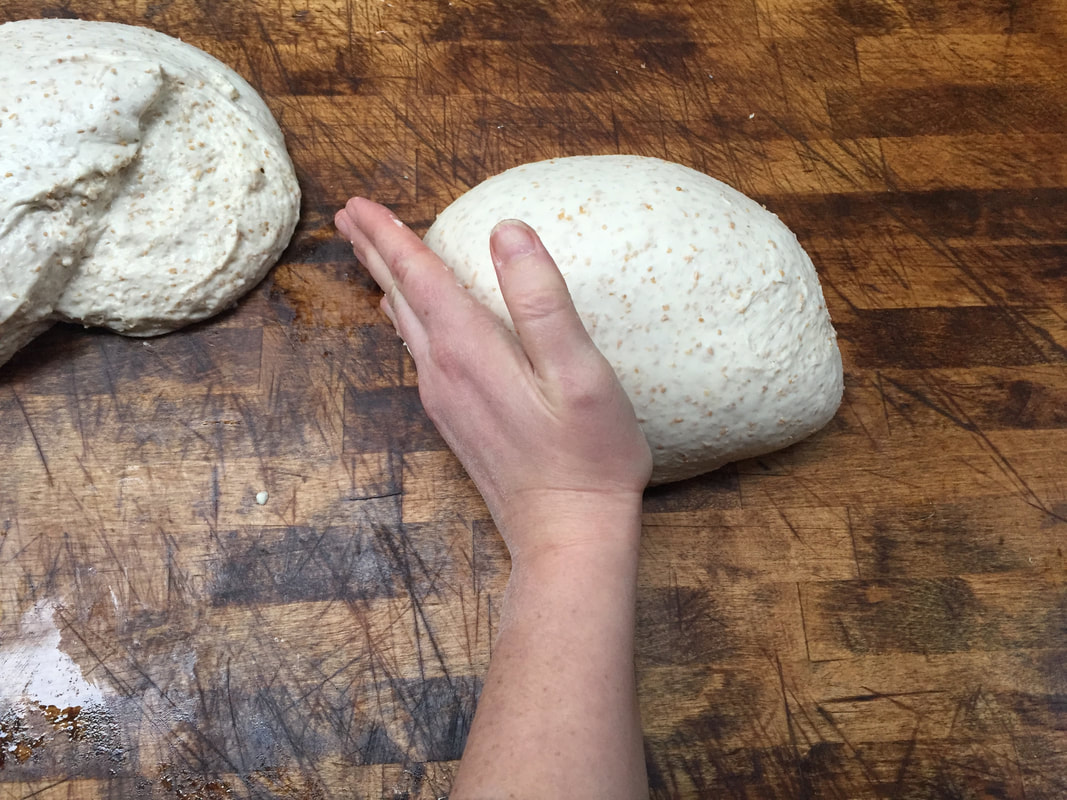
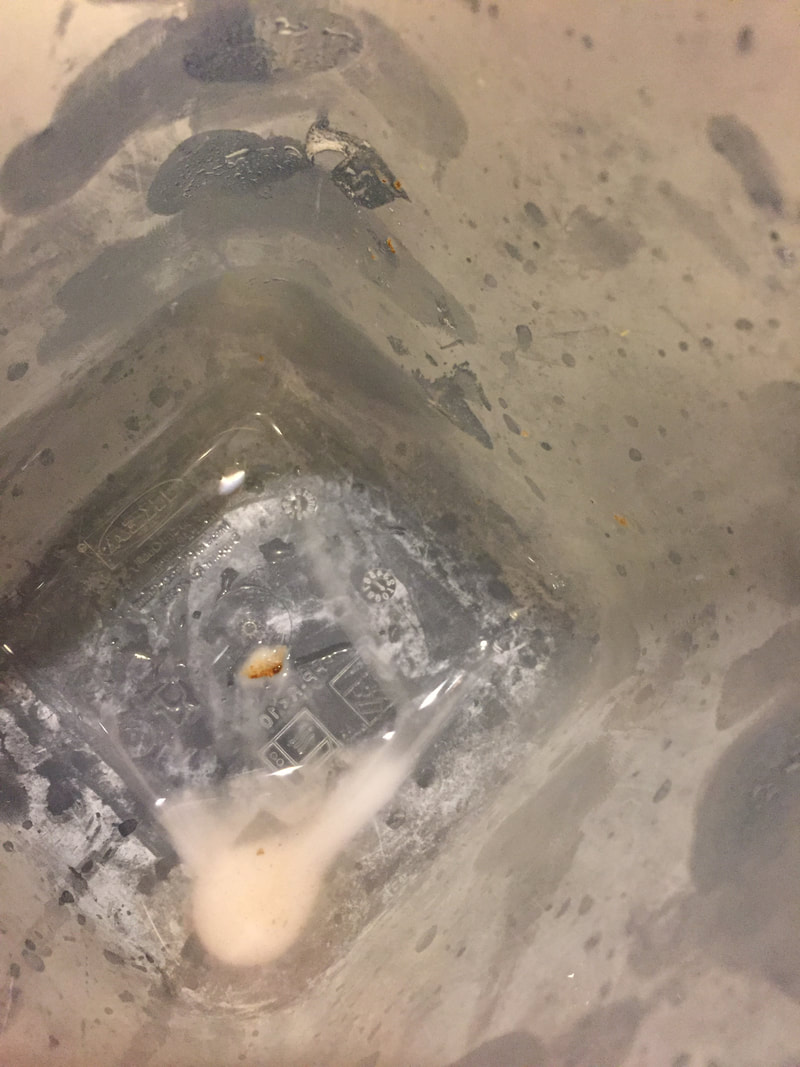
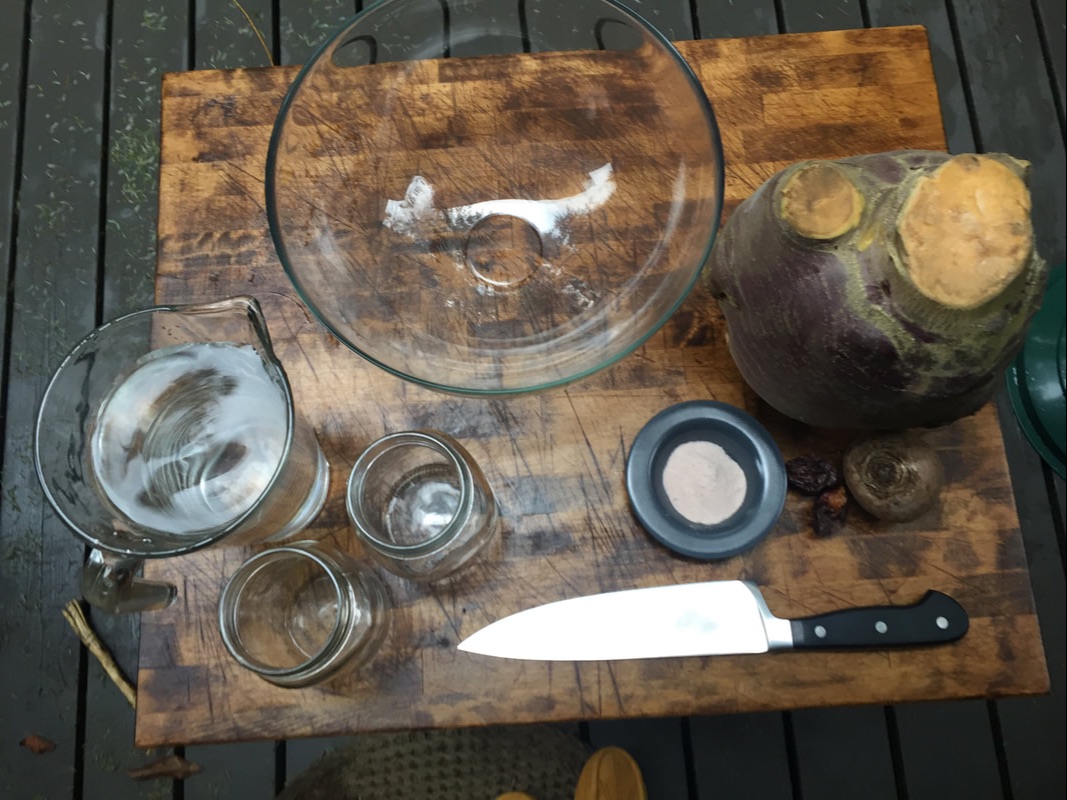
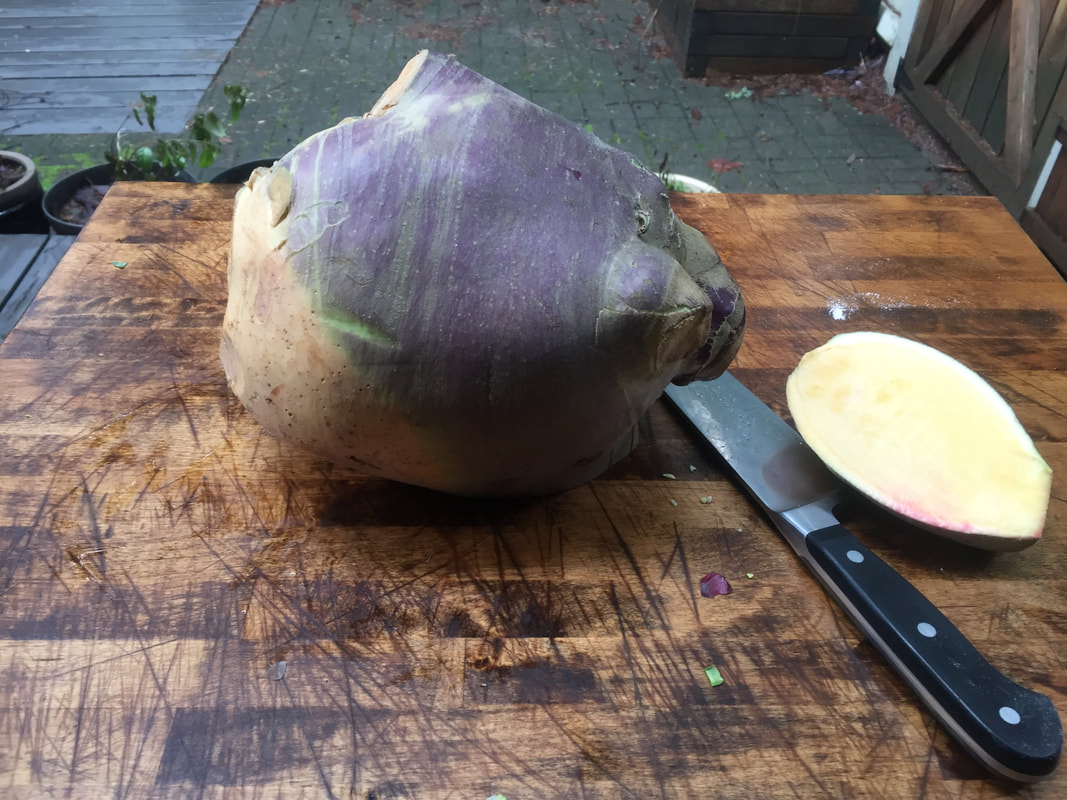
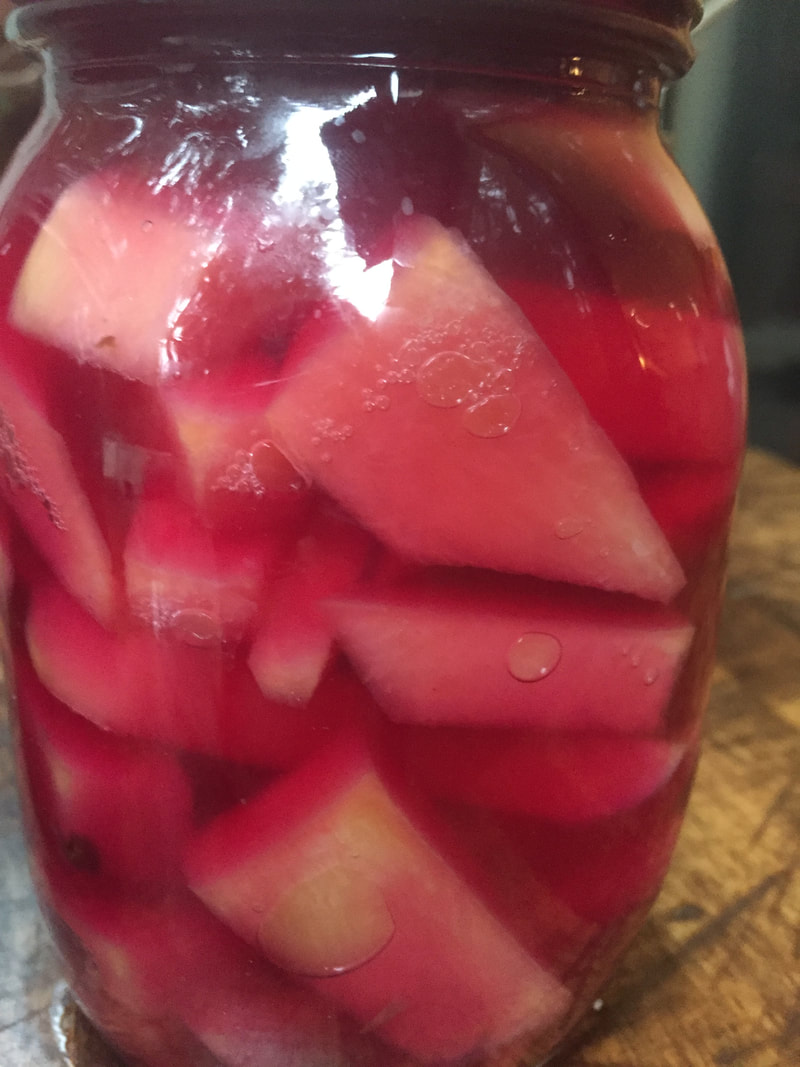
Making bread is intuitive and heavily influenced by style and personal preferences. This recipe and its directions are derived from Annabelle Choi’s incredible and refined process of making tartine-style artisan sourdough. There are many steps to the process, but not everyone will feel up to doing it all, so I am offering some alternatives. The fine-tuning aspects like pre-shaping or scoring, and steaming the oven are fun when you feel creative, confident, and energetic. That said, these steps are not essential to making delicious bread! The only things that are really important are: 1) a vigorous starter 2) good ingredients, and 3) an instinct for knowing when your bread is ready to go in the oven. In today's post I'll share my approach to making sourdough, including an addendum that features the step-by-step process of my exact timing. 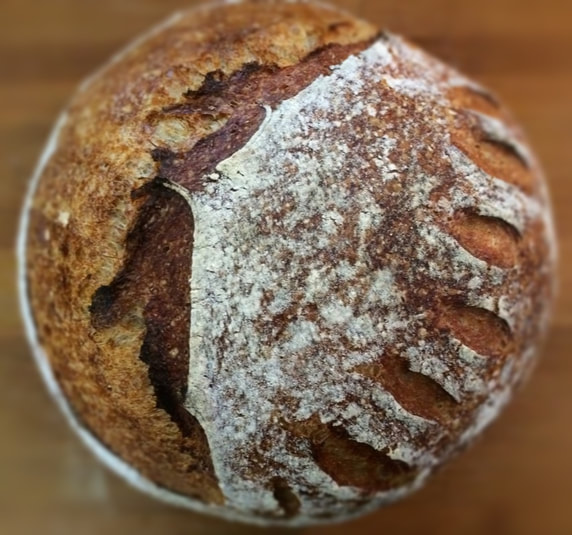 The reason I call this my 'full-moon' sourdough is because I find the best, high-hydrated recipes can be executed most beautifully during the full moon. This might be hocus-pocus, but I put a lot of stock on my permaculture and biodynamic studies, and I do consider the fact that gravity and dew-points can actually affect how we garden, bake, and live effectively. 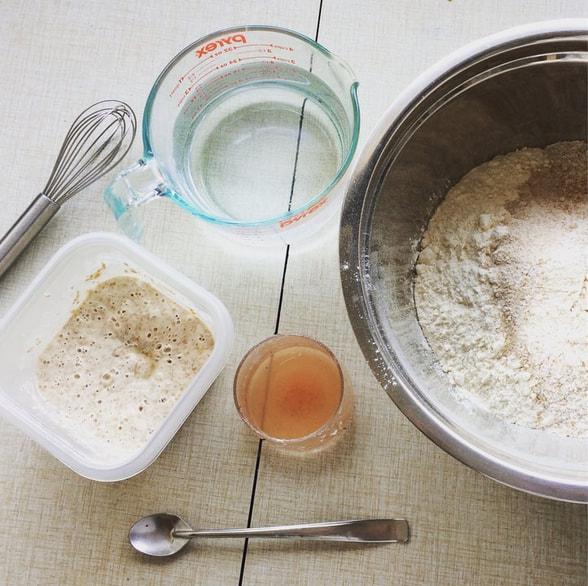 FULL MOON SOURDOUGHINGREDIENTS -200 grams active starter (or levain) -700 grams room temp water plus 50 grams hot water -1000 grams flour (white bread flour is easiest to work with when you’re learning, but any high-gluten or bread flour will work great. Avoid bromated flours.) -20 grams sea salt EQUIPMENT -baking scale** (this is important!) -whisk -large bowl -two medium oven-proof* pots or one large pot with their accompanying oven-proof lids -(opt) 2 batonnets -(opt) a baker's blade -(opt) a baker's paddle 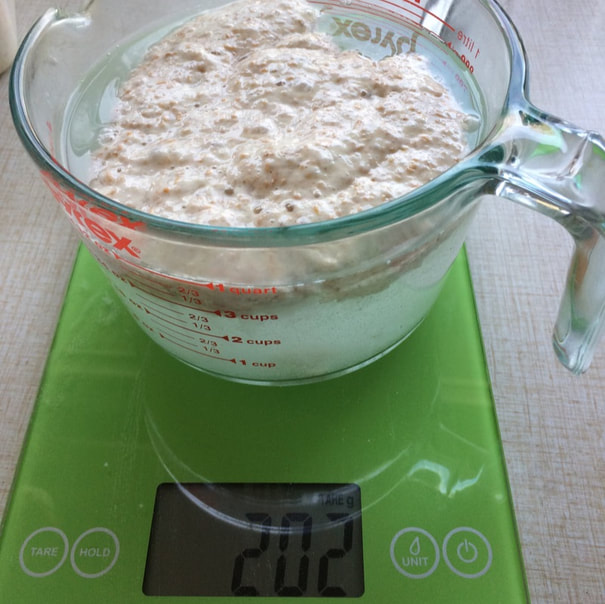 FOR STARTERS... Begin at least 24 hours ahead with the starter - feed it and keep an eye on it. If the weather is cold, your starter might need 24 hours to get really bubbly. If it’s warm and the starter is super active quickly, feed it again the morning (or 6 hours) before you plan to make bread. If your starter has been in the fridge for a long time without being fed, it may need several cycles of feeding before it’s vigorous enough to ferment a dough. The indication that the starter is ready is that it has doubled in size, feels light, and it will float on room temperature water. It should smell yeasty, sour, and pleasant - often the aroma of a good, healthy starter reminds me of Elmer’s glue. 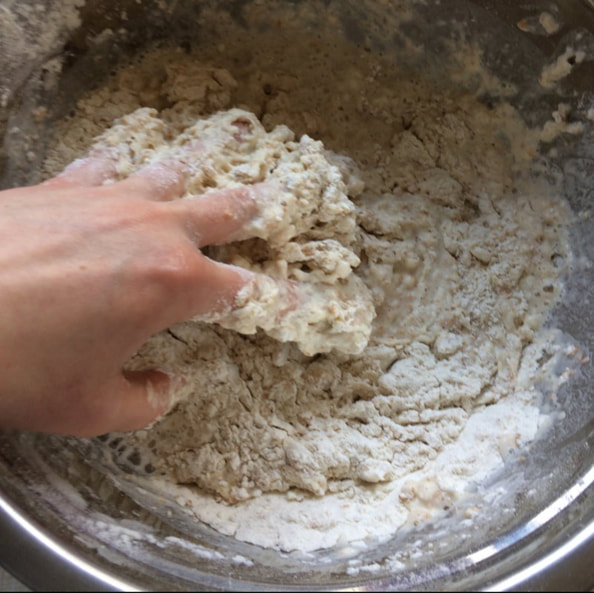 DOUGH - I like to begin in the late afternoon, say at 4pm. Measure out the water on a scale first - 700 grams. Then add 200 grams of starter. Whisk together water and starter vigorously to evenly distribute. Reserve the leftover starter to feed again and store. (see notes below on ‘feeding the starter’) Next, I work in the flour with my hands making sure it is evenly hydrated. Once it all comes together in an even but sticky mass, the dough has been formed. If you can't or don't want ton use your hands, feel free to use a stand mixer or the hands of someone you know :-) SALT - dissolve 20 grams of salt in the remaining 50 grams of hot water. Set aside to cool. (It’s ok if the salt doesn’t fully dissolve!) AUTOLYSE - leave the dough for at least 20 minutes to properly hydrate the gluten before adding the salt. The salt water should also be cooling during the autolyse period so it reaches the right temperature to add to the dough. POST-AUTOLYSE - add the cooled, salt water to the dough to evenly distribute. This means poking around and getting your hands dirty again.  REST - If you begin folding immediately after whacking it around with salt water, the dough will be very hard to work with, so best to give it some time to relax. The picture above is what your dough should look like after you have added the salt water and allowed it to rest for 20 minutes after which you may... FOLD - This usually starts happening around 5pm if you began at 4. Simply fold in each side (there are 4 sides) - left/right, then turn the dough and fold in the remaining 2 sides left/right. Repeat this process 5 more times at 30 minute intervals for a total of 6 folds. This process takes 3 hours which should bring us to 8pm. 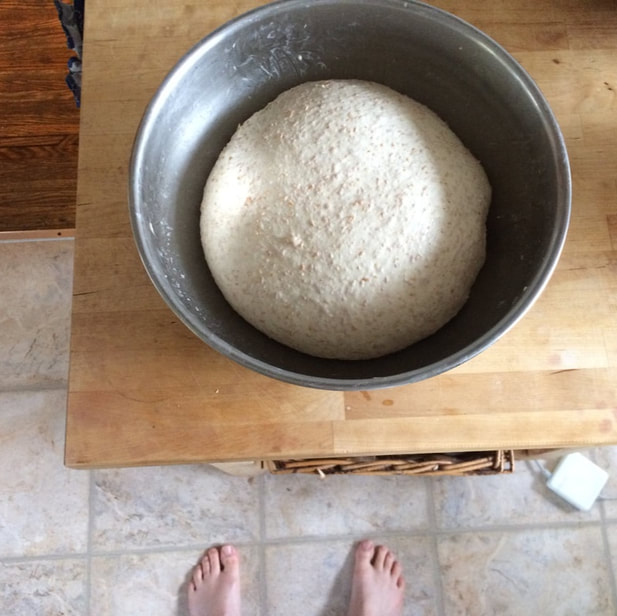 the dough after 4 folds and my baking bare feet BULK FERMENTATION - I like to bulk ferment in the fridge overnight because it gives the dough more time to develop flavour. To do this, put the dough in an oiled bowl, cover with plastic wrap, and tuck it into the fridge for a good night's sleep. PRE-SHAPING - the following morning, remove the dough from the fridge. Allow it to rest at room temperature for 30 minutes before working it. Then, dump the dough onto a floured surface and divide into two. To begin shaping the two halves into ‘boules’ or ‘rounds,’ repeat the folding process in addition to a final step - drag the dough toward you, along the surface you are working with to tighten the ball. Leave boules to rest for 30 minutes and then,.. FINAL SHAPING - Repeat the pre-shaping process and then put the boules into a rice-floured (or other fine starch) bowl. If you have a banetton, that’s amazing to use, too, but not essential. FINAL PROOFING happens in the floured containers, and takes 2-3 hours. You’ll know when the dough is 30 minutes away from being fully proofed when it springs back nicely from a poke from a floured finger and has doubled in size. PREHEAT the oven complete with bakeware and tray 30 minutes in advance of the end of proofing so that the boules don’t end up over-proofing while waiting for the oven. Most recently, I used a tray on the bottom rack and two medium-sized, oven-safe pots with lids. It is important to heat the entirety of the bakeware including the lids to maintain a very hot surface so the bread doesn’t stick. Once proofing is done and the oven is at exactly 470* F, the bakeware should also be thoroughly hot. Begin by removing one of the pots from the oven, sprinkling with some kind of rough meal like corn or oats or sesame seeds. Dump one of the boules into the pot, seam side down. At this point you could score (cut) the boule with a fancy design or just leave it to crack the way it naturally would. I have used a razor blade, a pair of scissors, or simply a sharp knife for this process. Replace the lid, return to the oven, then repeat the process with the second pot. 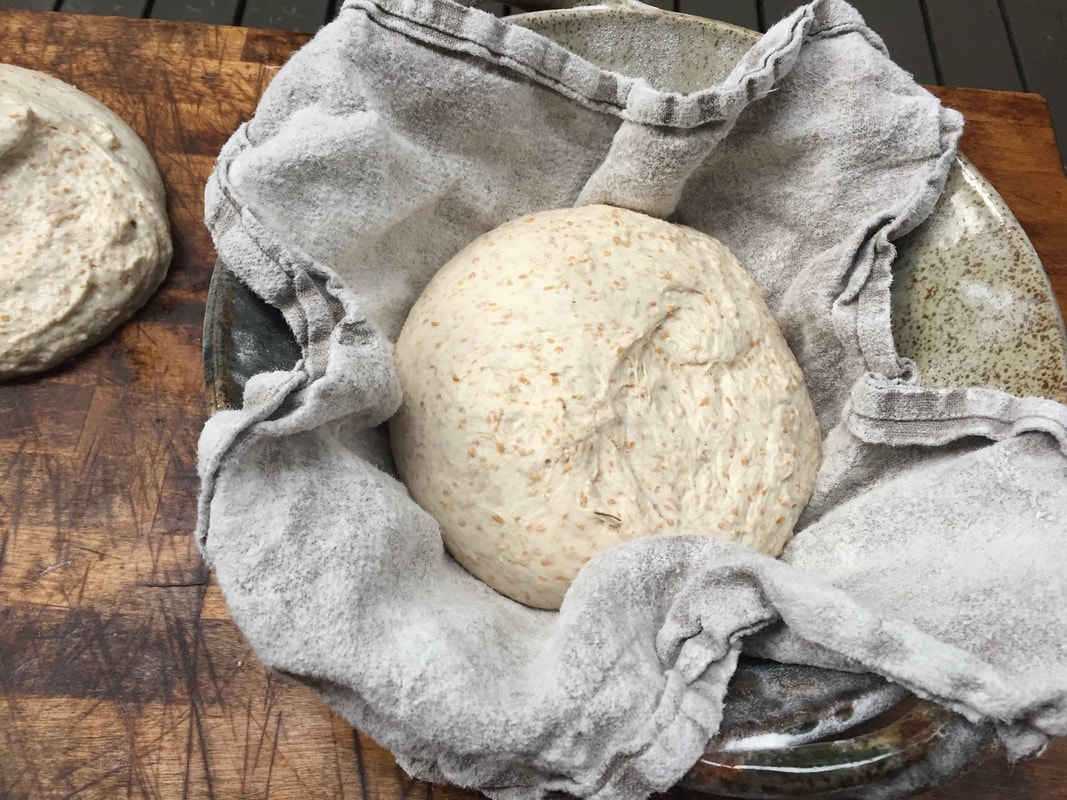 STEAM now take a cup of water and pour directly onto the baking tray that is on the rack below the pots. This steam will help create a nice crust. BAKE with lids on at 470* F for 20 minutes, after which you will remove the lids so the crust gets golden. Set a timer for 15 minutes. If the loaves aren’t brown enough, leave them in until you achieve the colour you want. If you desire fool-proof that your loaves are completely baked, insert an instant-read thermometer in the centre. It should read 190*F or higher when your loaves are done. COOL the loaves completely before eating them, lest they be doughy and less flavourful. 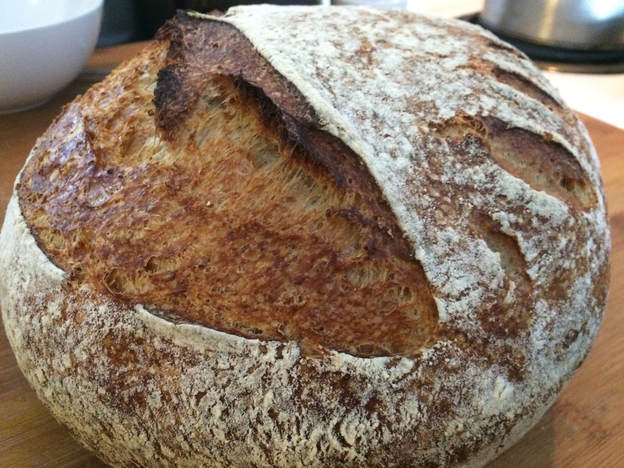 the finished bread scored to look like a radiating crescent moon TIMING STEP-BY-STEPAhead of time - FEED YOUR STARTER 24hrs (roughly) DOUGH 10 mins DISSOLVE SALT 5 mins AUTOLYSE 20 mins (minimum) ADD SALT 5 mins POST-AUTOLYSE 20 mins (minimum) FOLDS 3 hrs BULK FERMENTATION 12 hrs in the fridge PRE-SHAPING 30 mins FINAL SHAPING 20 mins FINAL PROOFING 2-3 hrs PREHEATING 30 mins (to occurring during proofing) OVEN STEAM 20 mins BAKE 20 mins COOL 1 hour FEEDING YOUR STARTERINGREDIENTS - 150 grams water - 30 grams leftover starter - 150 grams flour PROCESS Weigh ingredients in a tall Tupperware (I reuse 750ml yogurt containers) starting with the water then following with the starter. Whisk the water and starter together vigorously, then slowly incorporate the flour. Store in the fridge or leave on the counter to activate again and use for another loaf once bubbly and doubled in size. PS: the full moon in Vancouver, BC is coming up in two days (on January 31) which means it's the perfect time to wake your starter to bake with the lunar cycle. Mmm oil-slathered skin shimmering in the summer sun. Crispy chicken skin. Soft baby belly skin raspberries. Fuzzy peach skin. Skins over Shirts, always and obviously. So what about potato skins? I don't mean those ridiculous deep-fried, bleached, twice-baked, smothered-in-cheese and bacon bits and caramelized onions and sin-stuffed potato skins from TGIFriday's. I mean the scraggly bits of dirty, crusty peel left over from making the best, old-fashioned mashed potatoes. I always tossed them into the compost until dreamy Mr. Mark Singson from FAM INC showed me an amazing broth he made from baked russet potato skins for a potato agnolotti we served at a plant-based popup. I was converted. The earthy, rustic flavour satisfied my craving for minerals and gave me flashbacks of potato skin swimming pools filled with my mom's roast beef (or beets, if you're Vegan) gravy. I've found a lot of ways to use this byproduct of luscious meals that is equally as crave-worthy and comforting-- the following recipe being my favourite. 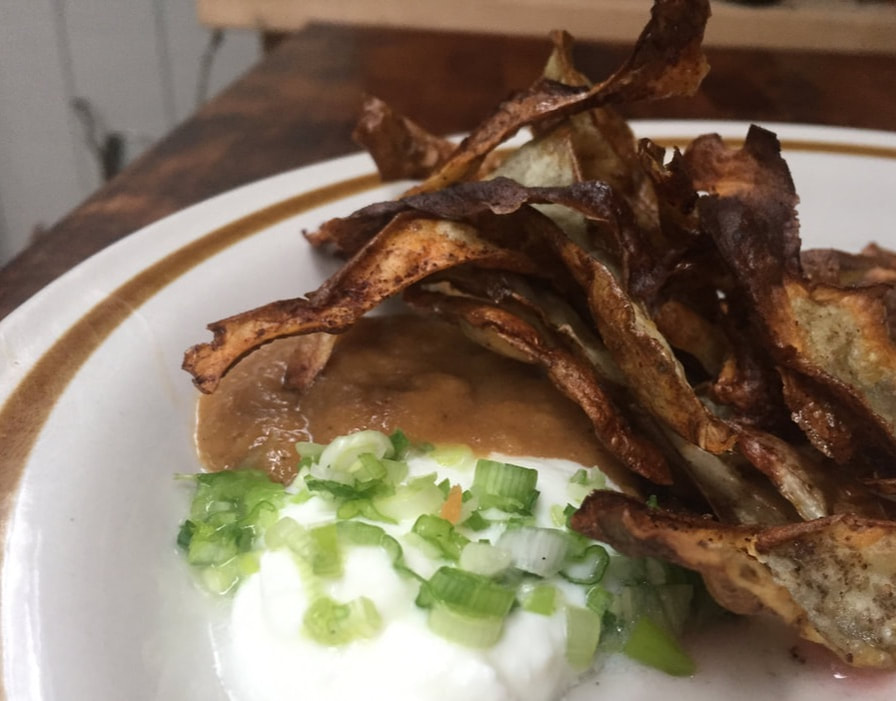 russet skin crispsWITH CULTURED CREAM AND ONION INGREDIENTS Potato Skins Leftover potato Peels from 4 large russet potatoes 1 tbsp olive oil Generous pinch of fancy salt (I used hickory smoked) Pinch of Chili powder Sprinkle of Fresh Ground Pepper Dip 1/3 cup cultured milk (yogurt, thickened kefir, sour cream, or creme fraiche) 2 green onions, minced PROCESS Soak the potato skins in cold water on the counter for 5 minutes, This removes the excess starch so they can get mega-crispy (you can see the leached starch at the bottom of the Tupperware in picture 2 above). Submerged, you could ferment the peels on your counter with a pinch of salt added to the water. This would take a 5-7 days at room temperature and give the peels a salt-and-vinegar flavour. For the sake of ease, don't ferment them, and simply drain and pat dry. Pre-heat your oven to a low Broil. At this stage we want to get the peels as dry as possible. There's lots of ways you could do this - dry in the sun, dehydrator, low oven... whatever. I just dabbed them with a tea towel and it was great and a little bit like bathing toddler. Toss the peels in oil, fancy salt, Chili power, and pepper. Lay out in a thin layer on a parchment-lined tray. If you don't have parchment, also not a big deal. Broil for 5 minutes, take out of the oven, turn, broil another 5 minutes. If they aren't crispy/brown enough, broil longer! They taste best really crunchy and brown. Keep your eye super close on them or they will burn. Dip into cultured cream with green onions while you're watching the sports or RuPaul's Drag Race. In the picture I globbered on some gravy, too. 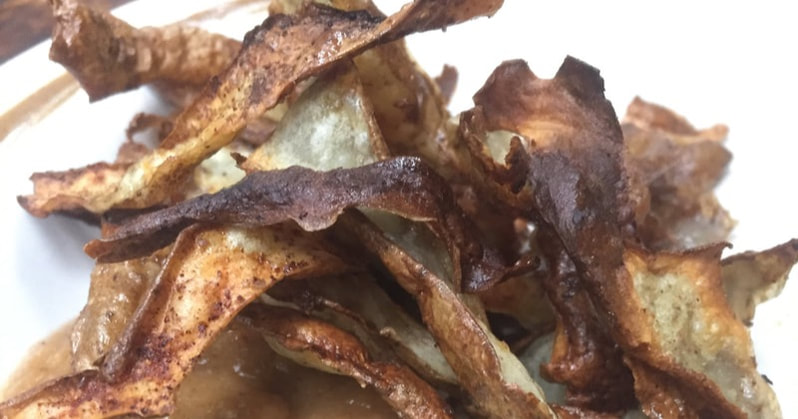 HANDS UP IF YOU LOVE RUTABAGAS! Their farty smell? Their weird, woody, deep-set skin? Over-cooked, mashed, watery and simply septic-flavoured? Undercooked, intensely radishy similar to skunk cabbage (not good)? The drowsy feeling associated with colonial, heteronormative family holidays and sad, cold, yellow. mush that nobody ate still sitting on the stained table, staring at me in my food-coma, wafting its memories of a butt once loved but never travelled? YAY! This is a queer ingredient if I ever saw one. Especially the elephant-heart sized version I have featured in the photo (it was gifted to me as a, "... please? will you do something with this... thing?") 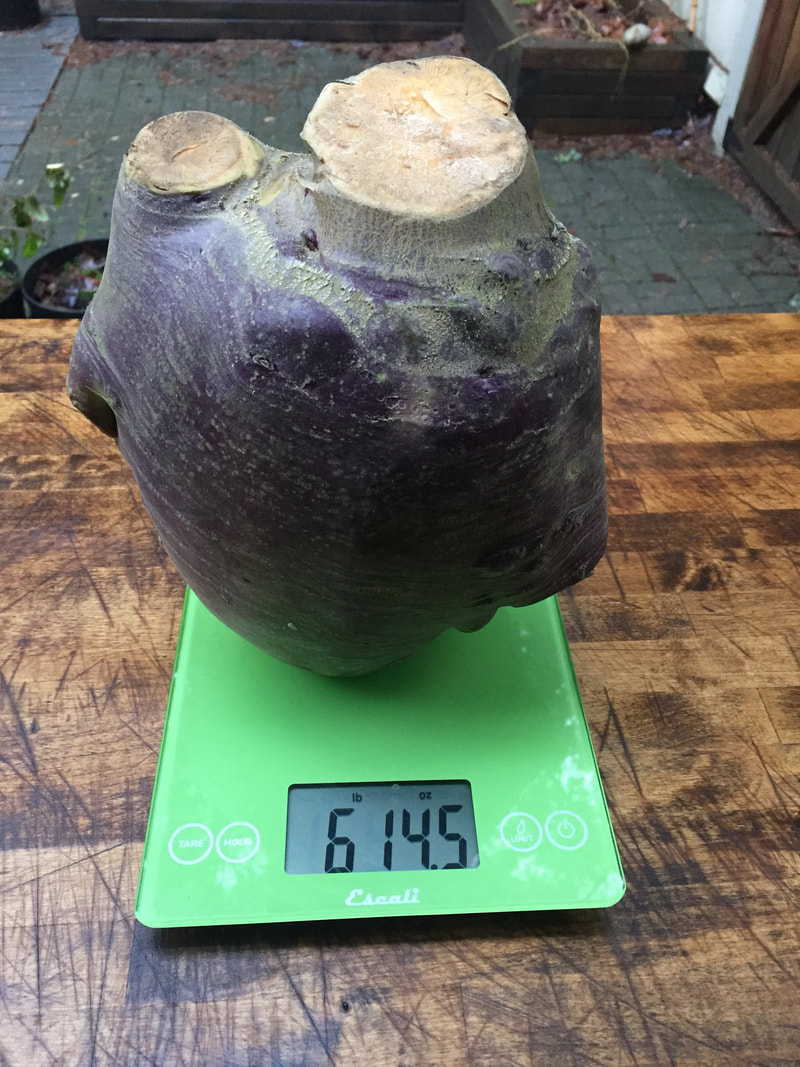 This fucking behemoth weighs nearly 7 pounds and I need to find recipes that don't suck (no thanks 'creamy-liquid-smoke-whipped-root-bag_of...pfft'). I have been handed a challenge and I shall rise to it like a noxious cruciferous gas. The plan is to weigh this impossible vegetable before each recipe, slowly butchering dear Rudy chunk by chunk, and hopefully ending up with something that doesn't make us all feel very sad. Everything is going to be delicious, is the thing. It's just intimidating because we don't know it very well, yet. And even if it tastes like fartypoopoo, that's ok because the results may be hilarious and that is maybe more fun. Anyway, let's get started. Here's Rudy Recipe # 1: shwarnnabe pickles(that's a play on shwarma-wannabe)
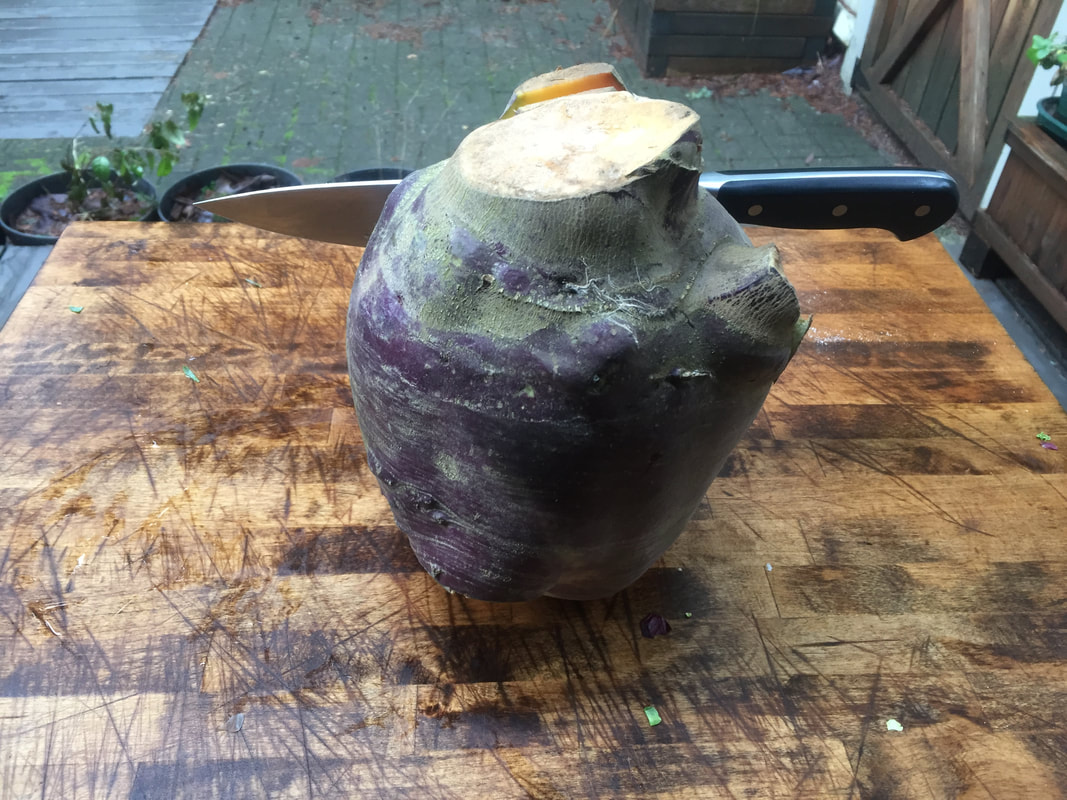
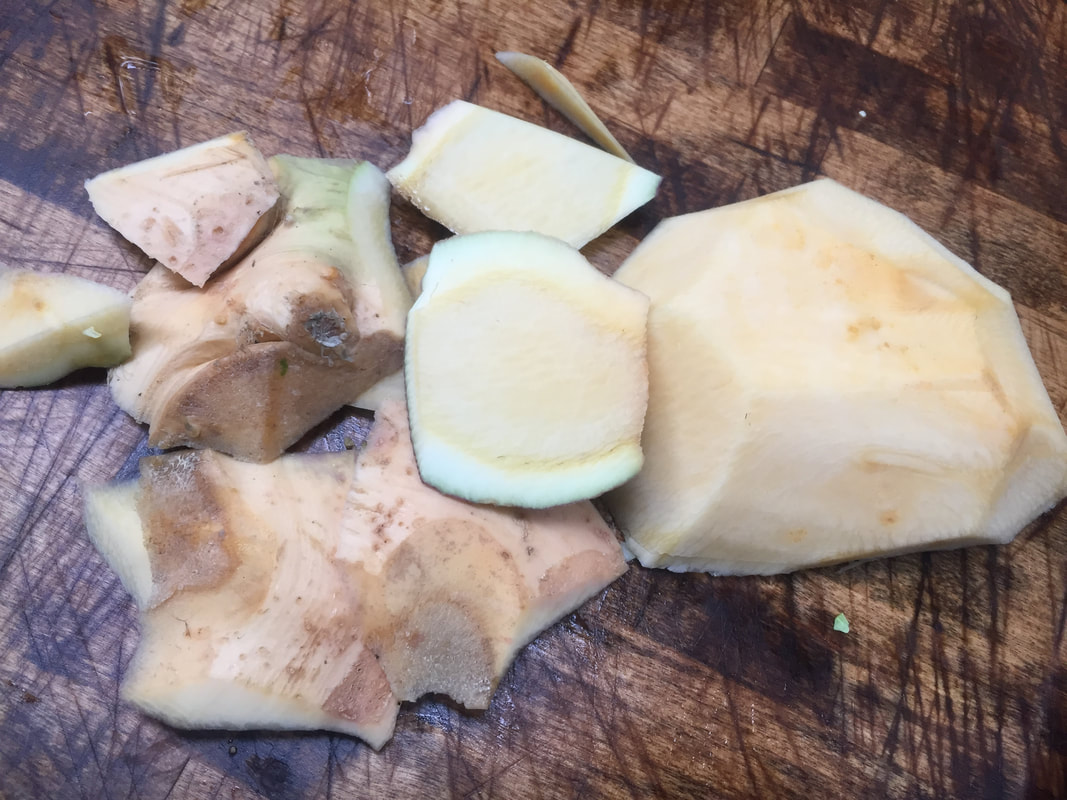
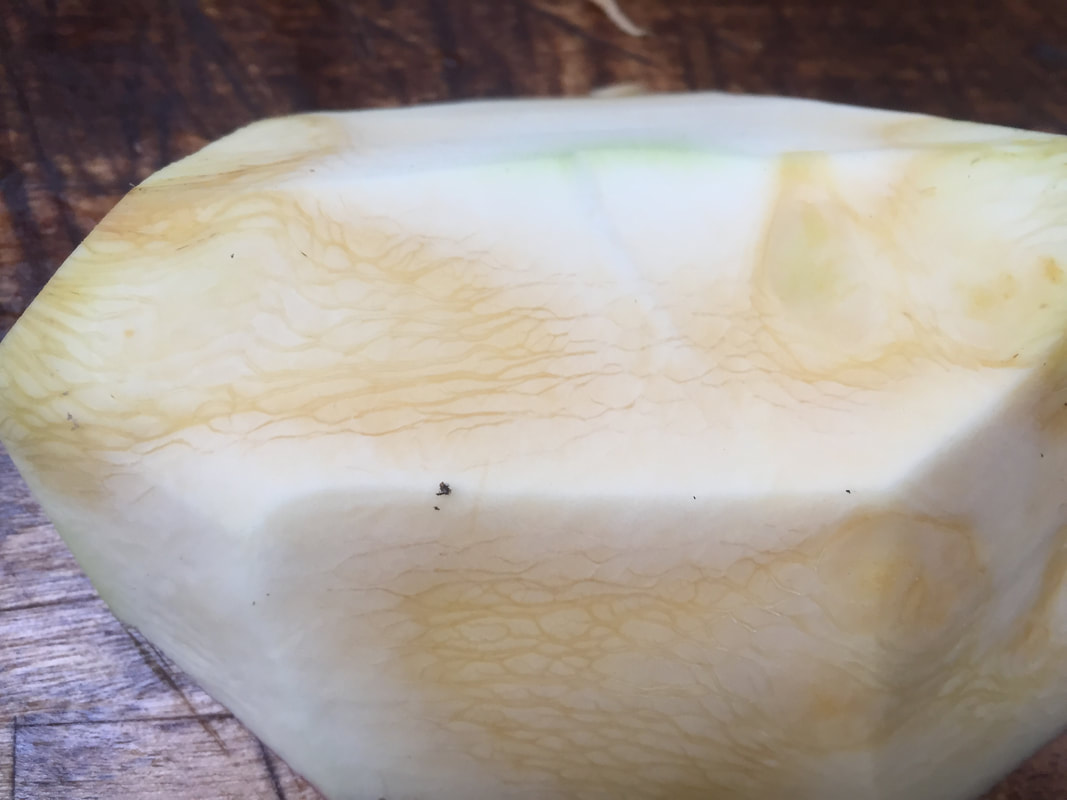
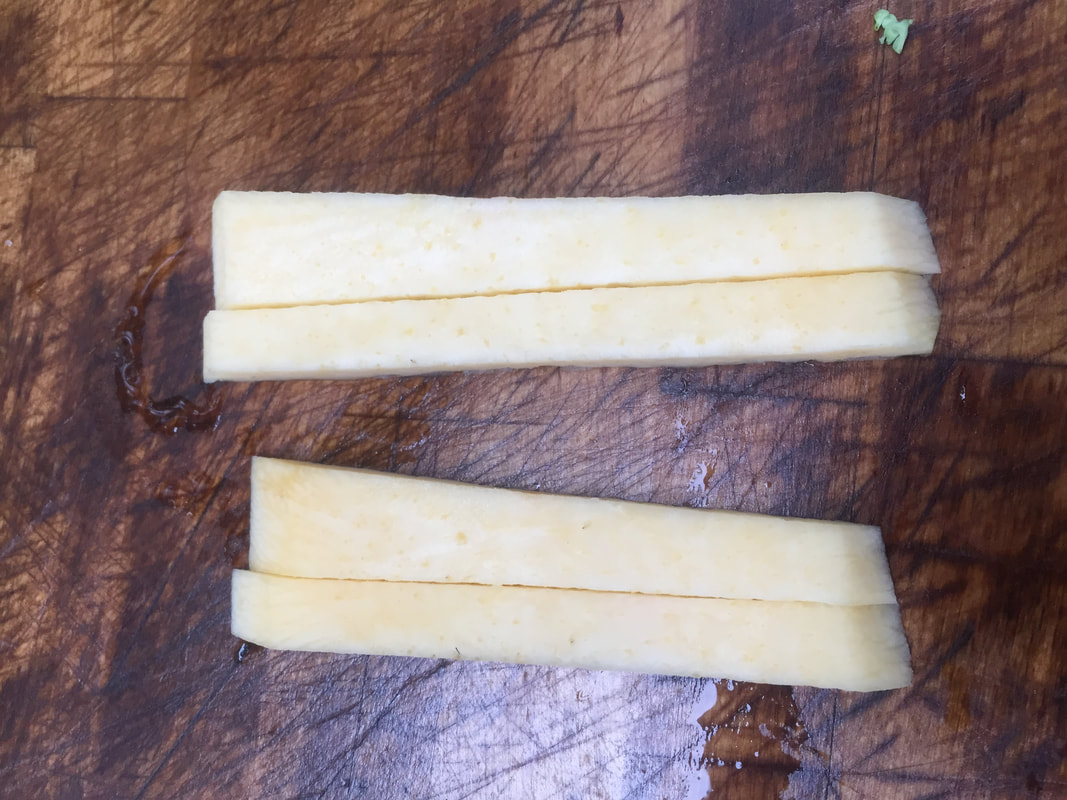
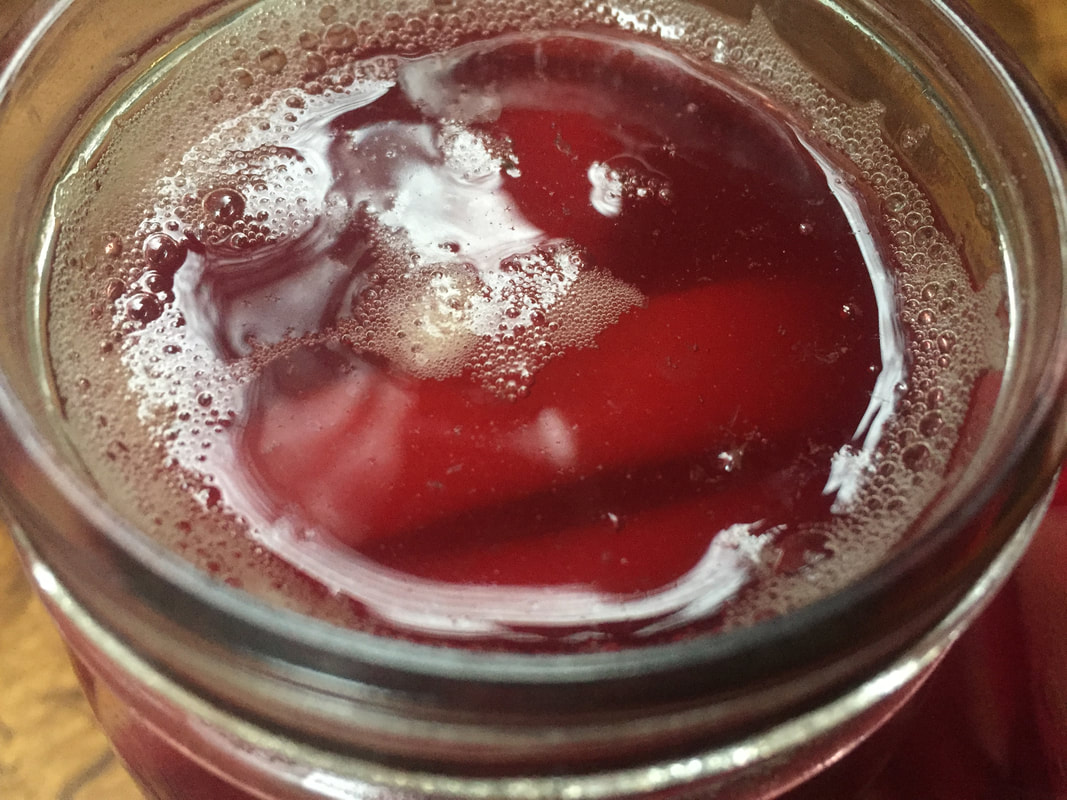
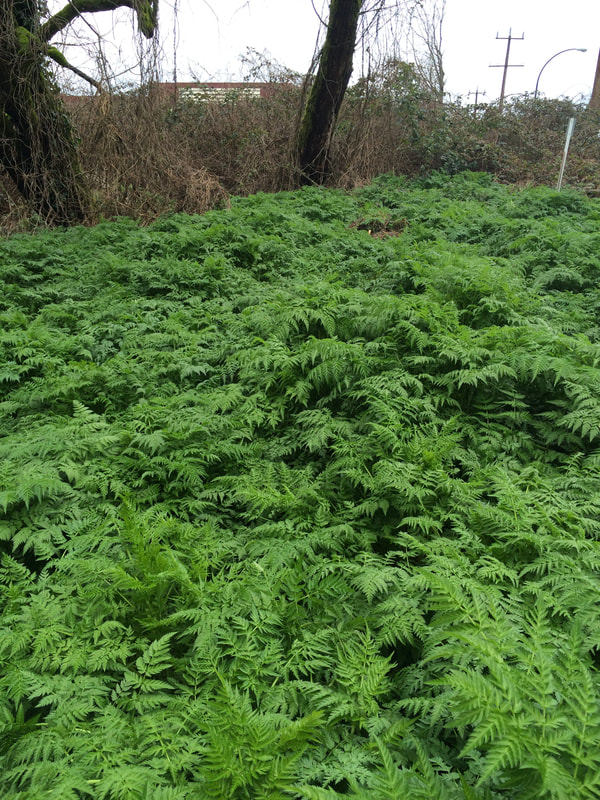
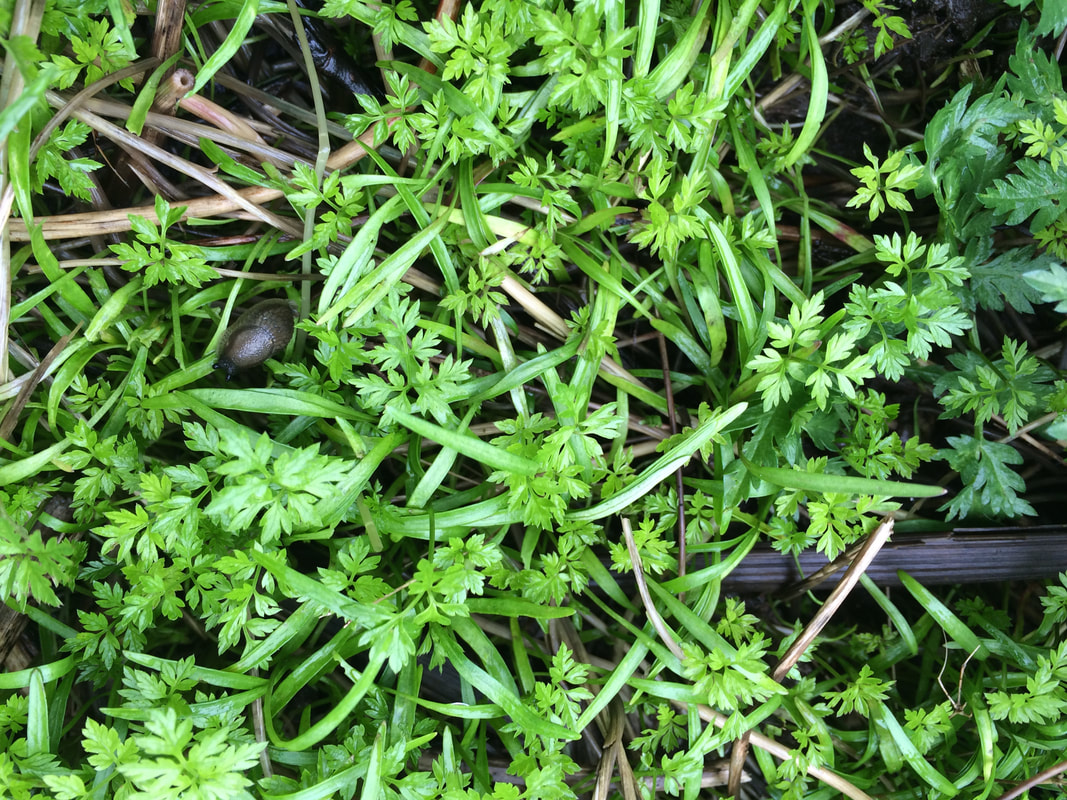
this is another fermentation recipe......and this huge vegetable needs some prep work, so keep in mind the duration of the process may take place over several days. (ahead of time) bitcher - Butchering a gigantic Rutabaga is a bitch. It's heavy, dense, and rounded (sort-of) so it will bobble all over the cutting surface. The important thing is to make sure it is fully secure. I started with some straight edges already cut into the vegetable, but you may not. To secure a rutabaga, use a tea towel wrapped around its base so it won't go flying. Work your way into the vegetable slowly, with confident pressure, and with a nice, heavy knife to help do the weightlifting. Once you have a smooth flat slice, get rid of the towel and place your rutabaga with it's flat sliced side on the surface (as pictured in the second photo of the series above). de-skin - sometimes the skin of rutabagas and similar vegetables like kohlrabi or turnips can have a very woody or thready texture that penetrates into the flesh. It's for this reason we remove the skin with a knife, not a peeler. Notice the different shades in the chunk in picture 4 above - we want to get rid of all lighter coloured flesh because it could be like chewing on a stick with floss running through it. Test your veg, though. If you can bite through it cleanly and it has a pleasant, crunchy texture then it may be fine. cut rutabaga into pinky-sized chunks. You could try and find something creative to do with the skin but I thought the compost felt more in tune rutabagas today, so I handed over the torch. PROCESS Toss the prepared rutabaga chunks with fine sea salt. You can use any kind of salt you want, but avoid preservatives or iodine because they may interfere with fermentation. At this stage they should be way too salty to eat and that is what we want. Boil the 2 pints of water and pour over the grated beet and hot chilli pepper. Steep like a tea and then allow to cool completely while the rutabaga chunks macerate in the salt. You could leave the whole, unmixed lot on the counter overnight if that suited you. Next, pack 2 very clean pint jars with the salted root and top with the cooled beet tea. You could strain it, or not. It doesn't matter. (nothing matters. everything in life is weird) Leave it covered with a cheese cloth on the counter until it ferments to the sourness you prefer. I left mine 10 days and it's mid-winter (like 0-8 celsius outside). You'll know it is fermenting because tiny bubbles will appear on the surface, eventually creating a layer of Kahm's yeast if you don't skim it. This is totally harmless (similar to the bloomy rind on a brie cheese). RESULTS Jury's still out on this one. I am waiting to hear back from the CSA members who desperately gave the thing to me in the first place - the pickle jar is sitting in the back of their fridge, blinking its eyes ever-so-sweetly at them... "mommy?" Stay tuned for RUDY RECIPE # 2 when we knock a couple more ounces off this bad boy and shred it into pancakes. 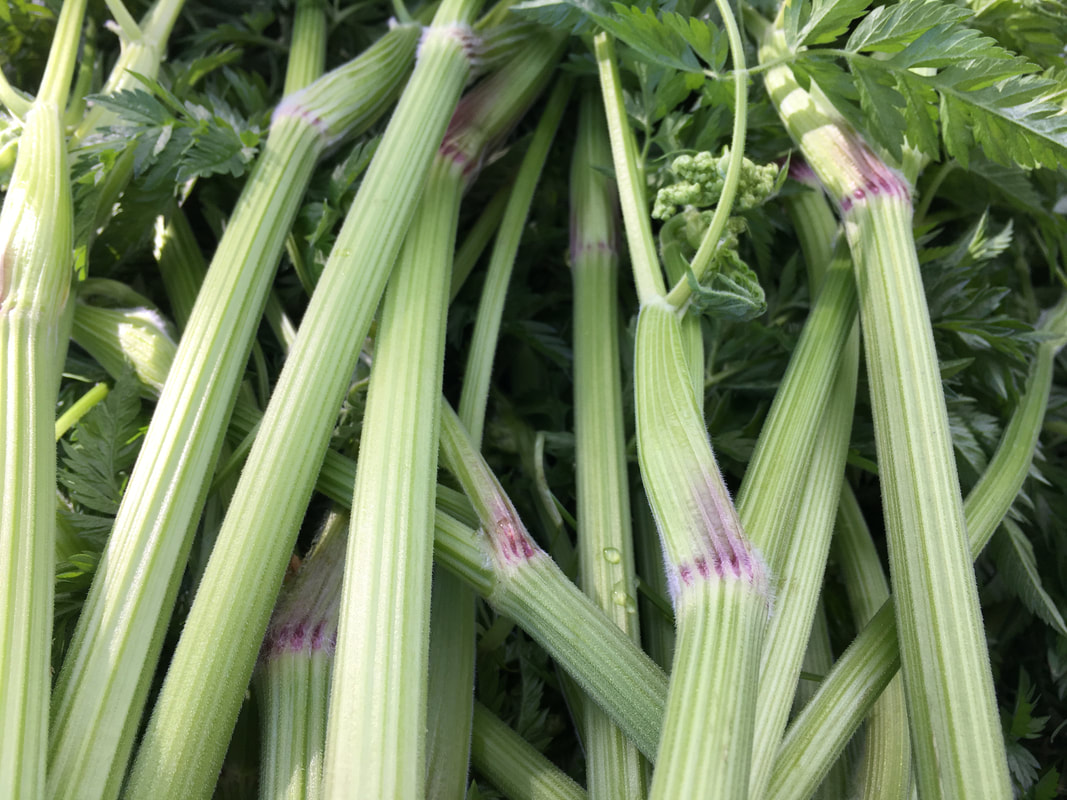 Kingdom: Plantae Family: Apiaceae (carrot) Genus: Anthriscus Species: Sylvestrus Common Name: Cow Parsley, Wild Chervil Cow parsley is an edible herb in the carrot family, which means it can closely resemble poison hemlock and other toxic plants. Anyone gathering this plant should be very familiar with this family and all its relatives, as many are delicious while others are deadly. Other important considerations (as with all edge species) are whether this plant has been treated with poisonous herbicides or grew near polluted areas like train tracks (creosote). Cow Parsley is a bioaccumulator, which means it serves to clean and filter toxins and pollutants from the environment but can accumulate these poisons in its roots, leaves, flowers, and seeds. Key features of this plant include: -Blushing at the joints that resembles intentional purple/pink paint strokes (NOT BLOTCHES) -Hairy stems (look closely at the joints in the picture above - they have very fine hairs or fuzz) Edible Parts: -Delicious roots, similar to a carrot but white or cream-coloured. Harvest roots in the cool temperatures of the early spring or late fall when they are the sweetest and most tender. - Young leaves make a lovely potherb - Spring stem shoots are tender, hollow, and tasty. They pickle very well and could double as a straw in a caesar! -Flowers are a lovely, edible garnish -Seed pods are a carrot/celery-like spice. Dry and add to your caesar rim 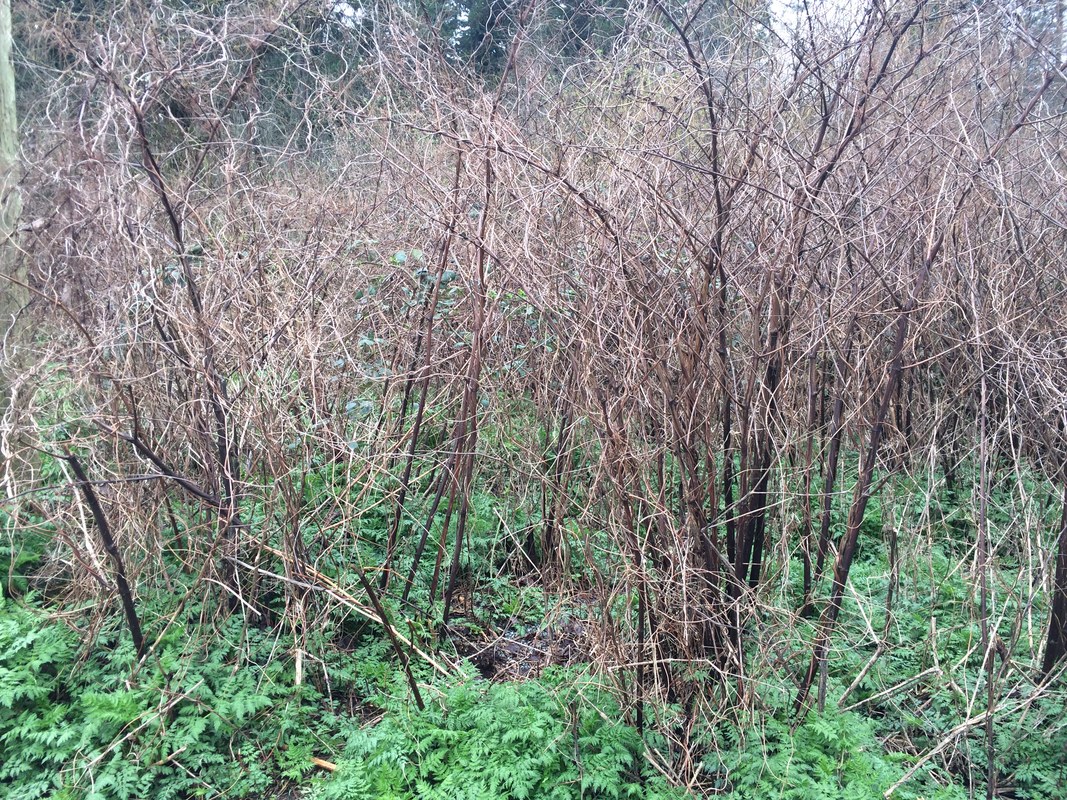 Cow Parsley is an opportunistic weed. Pictured above, it is growing at the base of Japanese Knotweed rhizomes. If you look really closely you might be able to make out some aggressive hop shoots who have been treating this invader's land like a nursery. All three (cow parsley, knotweed, hop shoots) are edible, invasive, and very tasty. Again, be mindful of any herbicide treatment because these plants are usually demonized by cities and gardeners alike.
I don’t think there’s such a thing as ‘free food’ Especially when it comes from the wild
|


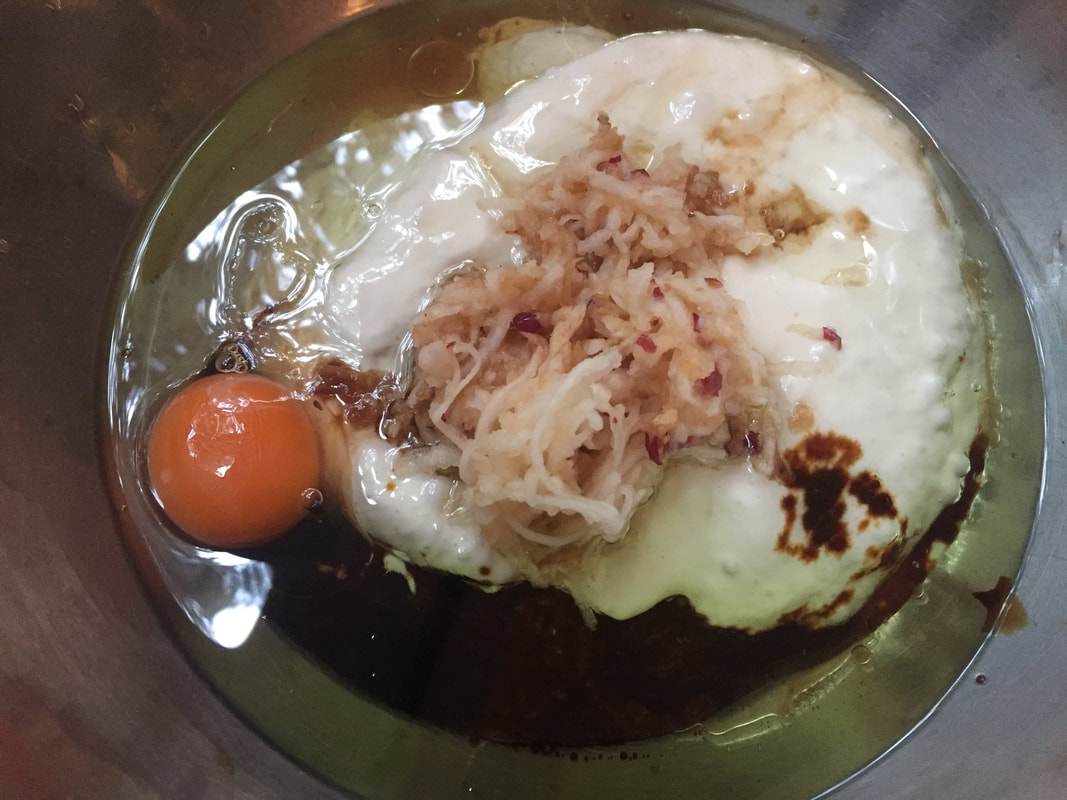
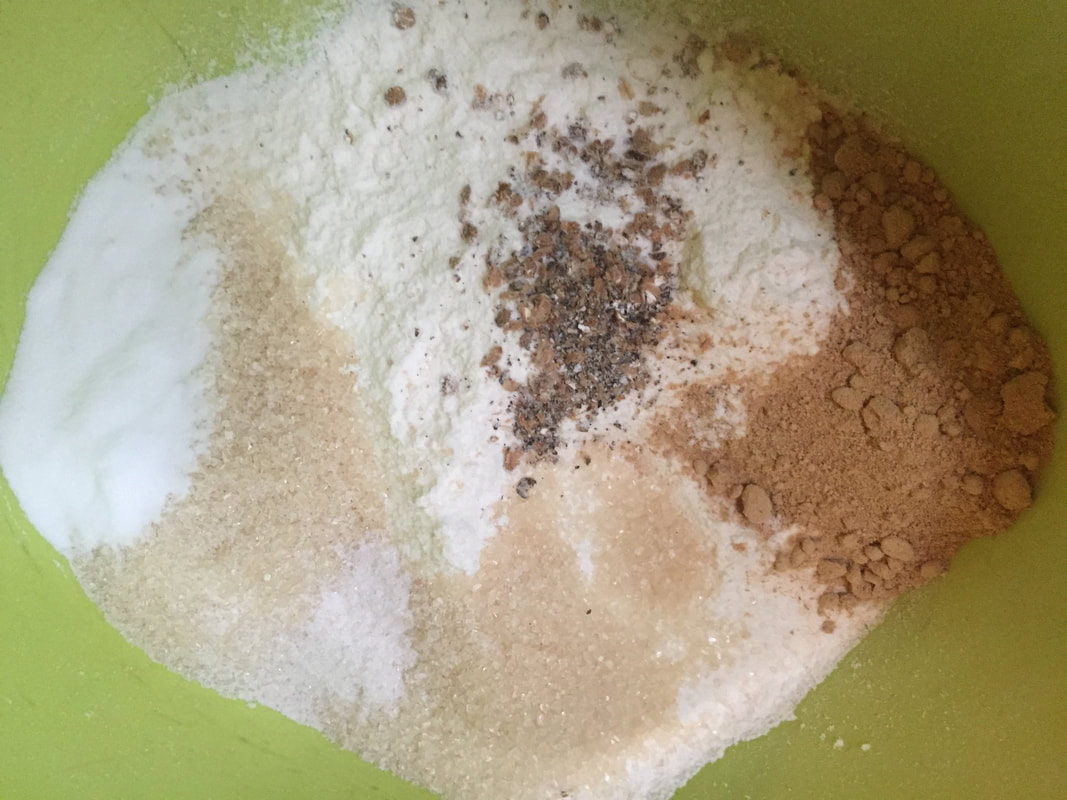
| Batter - WET INGREDIENTS
| Batter - DRY INGREDIENTS
|
OPTIONAL INGREDIENTS
| Stuffing (optional)
| Topping (optional)
|
*(or whatever flour! I've used ground raw oats, gluten-free all purpose flour, whole grain spelt flour... possibilities are endless)
**for fruit, I use whatever weird treats I have in the freezer, left over from making liqueur infusions, or going soft on my counter. In the photos I've used halved plums.
**for fruit, I use whatever weird treats I have in the freezer, left over from making liqueur infusions, or going soft on my counter. In the photos I've used halved plums.

PROCESS
(at least 8 hours ahead)
Combine cake ingredients in this order:
1) wet
2) dry
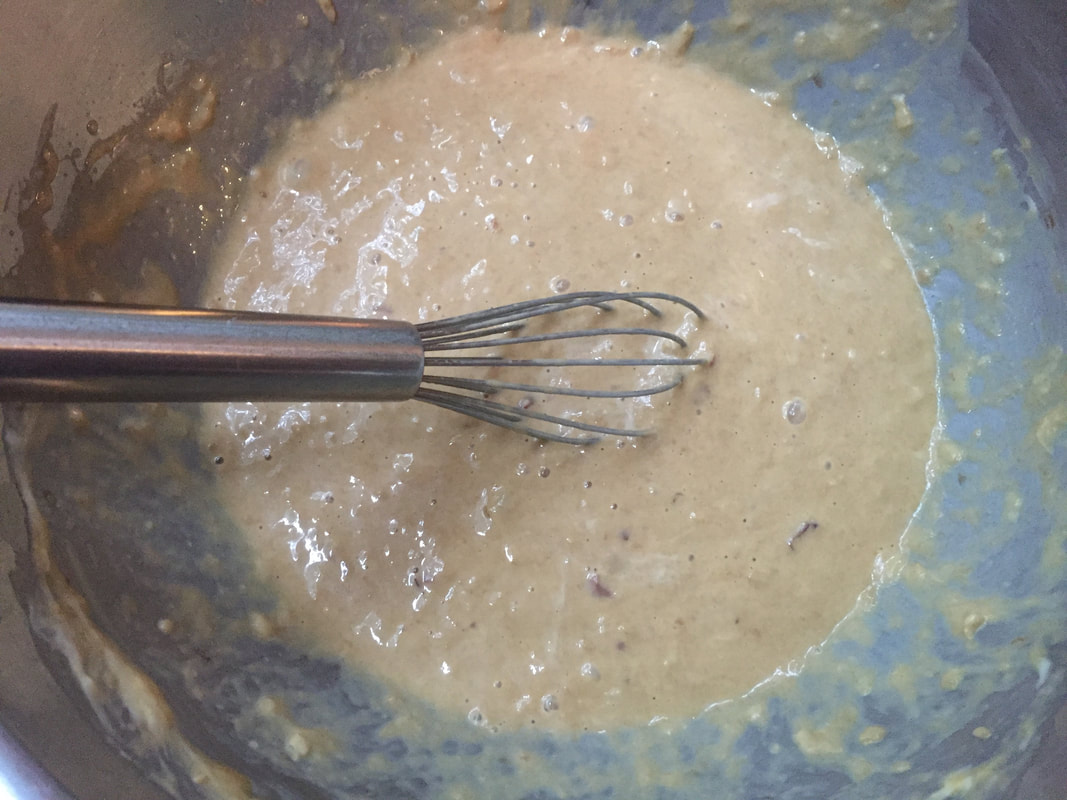
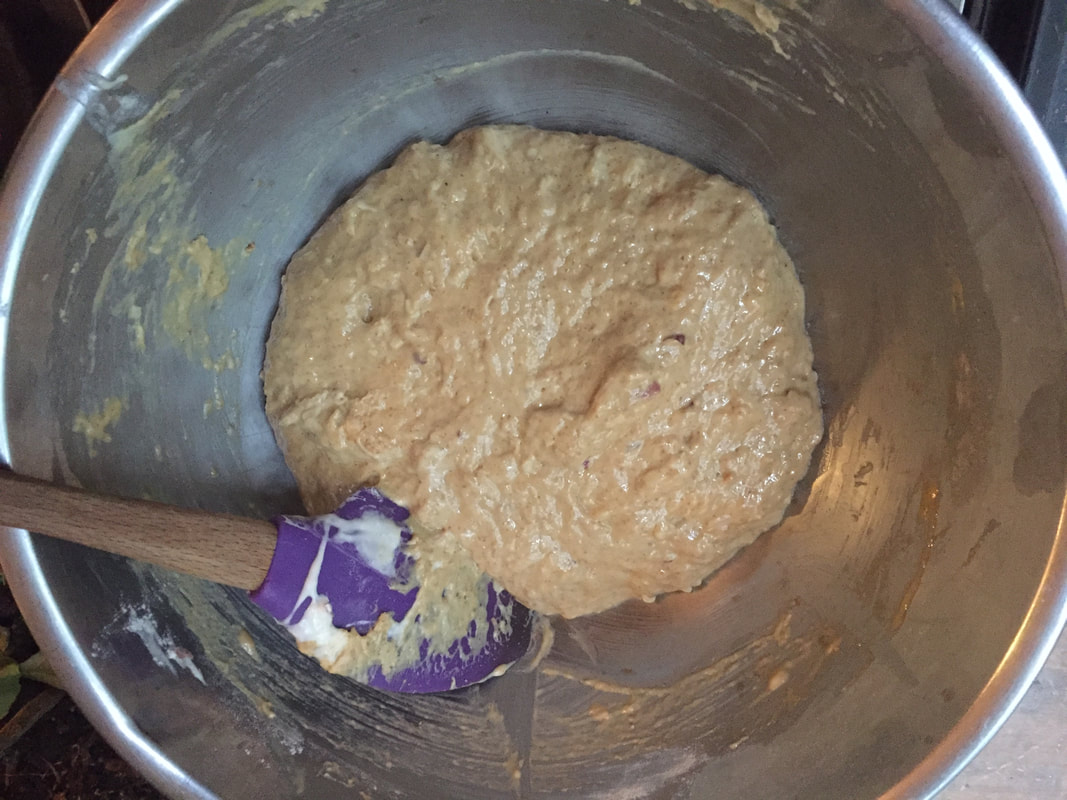
3) wet and dry together.
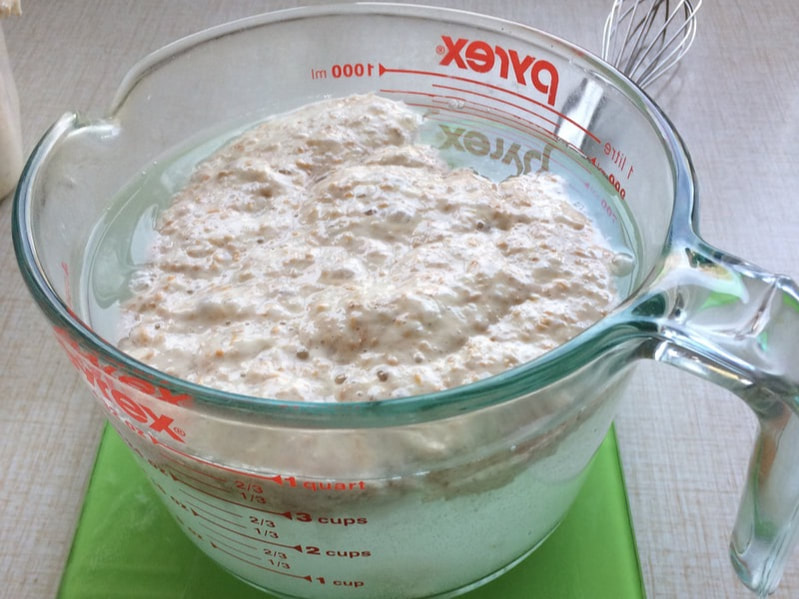
Allow to ferment on the counter overnight or all day. You'll know it's ready to bake when it looks billowy, like a happy cloud of sourdough starter. If your timing is off you can toss it (covered) in the fridge to slow it down, or in an oven or dehydrator on the lowest possible setting to speed it up.
(at the time of baking)
Preheat the oven to 350F.
Coat the fruit with sugar and starch and set aside.
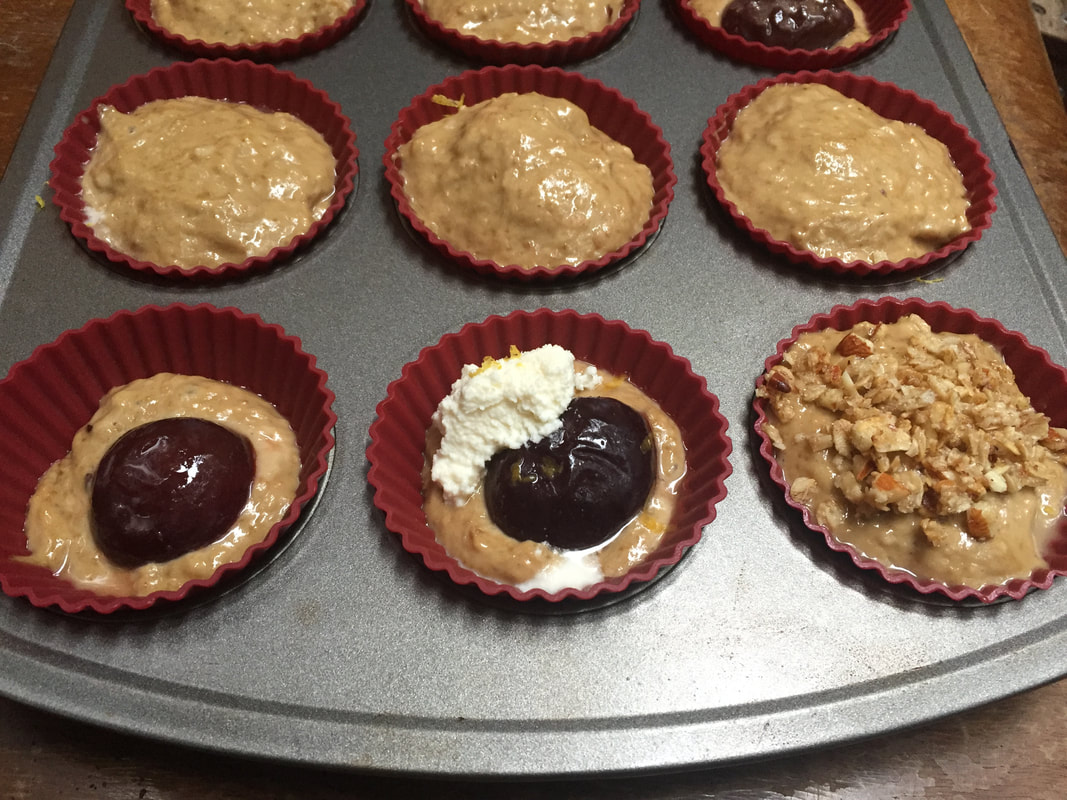
Build your muffins in tins or silicone cups in this order:
1) 1 tbsp batter
2) starch-coated fruit (if desired)
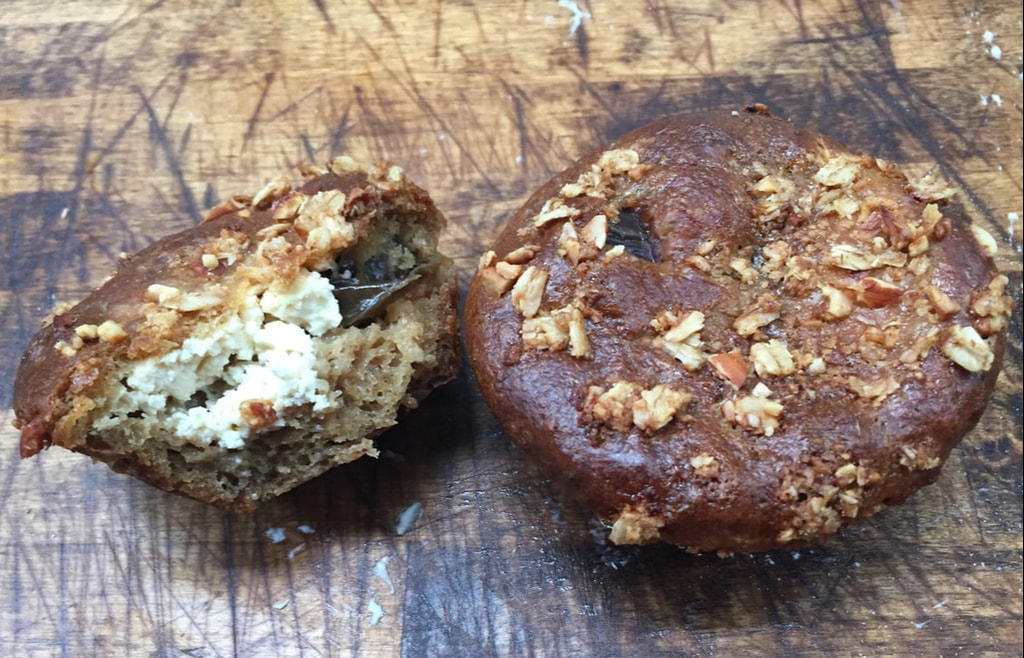
3) 1 tbsp ricotta sprinkled with lemon rind (if desired)
4) 1 more tbsp batter
Try to seal the stuffing inside the batter so it doesn't ooze all over the place and empty out your muffins.
If you want to top the muffins, combine the topping ingredients and sprinkle on the top of the muffins. Bake at 350 F 30-40 mins.
(at least 8 hours ahead)
Combine cake ingredients in this order:
1) wet
2) dry
3) wet and dry together.
Allow to ferment on the counter overnight or all day. You'll know it's ready to bake when it looks billowy, like a happy cloud of sourdough starter. If your timing is off you can toss it (covered) in the fridge to slow it down, or in an oven or dehydrator on the lowest possible setting to speed it up.
(at the time of baking)
Preheat the oven to 350F.
Coat the fruit with sugar and starch and set aside.
Build your muffins in tins or silicone cups in this order:
1) 1 tbsp batter
2) starch-coated fruit (if desired)
3) 1 tbsp ricotta sprinkled with lemon rind (if desired)
4) 1 more tbsp batter
Try to seal the stuffing inside the batter so it doesn't ooze all over the place and empty out your muffins.
If you want to top the muffins, combine the topping ingredients and sprinkle on the top of the muffins. Bake at 350 F 30-40 mins.
besides waiting for the batter to ferment...
...this recipe is mega-easy. It's also very forgiving so be creative with modifications. If you just want a nice muffin without too much fanfare skip out on the stuffing and/or topping altogether. If you hate muffins or don't have a tin you could make this into a loaf or cake instead. Try swapping a stuffing for a caramelized fruit underside for an upside-down cake baked in a springform pan- I've done it with caramelized pears and it was ridiculous. You could even skip baking the batter altogether and cook it on the griddle as pancakes. Adjust the spices, substitute the sweeteners, make it vegan with flax eggs... you get the idea.
Also, please share any experiences you've had making this recipe and modifications you've made!
Also, please share any experiences you've had making this recipe and modifications you've made!
this is a post about some friends of mine.
They are volunteers, organizers and participants contributing to a project called Forest and the Femme, a,
'Non-profit outdoor recreation program for highly marginalized women (trans, cis and gender-diverse) living in Vancouver’s DTES community. [Who provides] access to nature for the city’s most vulnerable and isolated women. [Facilitating] a sense of freedom, empowerment and self worth through contact with nature, skill building and social engagement.'
(adapted with permission from the FAF website)
(adapted with permission from the FAF website)
Volunteering with this organization in 2016 and then working in an honorarium capacity in 2017 benefitted my own perspective at least as much as it benefitted the women participating in the outings. I learned so much about my facilitation style and gained wisdom shared by the participants and organizer that I would never have had access to otherwise.
Basically, I just want to call attention to the amazing work that's being done with FAF, and encourage people to get involved or donate. Or, at the very least, I want to encourage you to read their mandate and let people know about the awesome stuff that's happening.
Basically, I just want to call attention to the amazing work that's being done with FAF, and encourage people to get involved or donate. Or, at the very least, I want to encourage you to read their mandate and let people know about the awesome stuff that's happening.
Next month, instead of indulging in Valentine's Day as a consumer of superfluous and over-priced chocolate hearts and caviar, consider joining me and some of my friends at:
the heartwarmer a night of laughter, existential eating, and ethical hedonism.
SUNDAY, FEBRUARY 11TH, 2018 AT GRAPES AND SODA
6pm or 830pm | veg dinner + bubbles | $65
Chef Heather Dosman (Existential Eating), Food Educator Camille Flanjak (me) and our hilarious guests are donating a portion of the proceeds to the Forest and the Femme.
Tickets for comedy, dinner and a glass of bubbles are $65 including tax and gratuity.
6pm or 830pm | veg dinner + bubbles | $65
Chef Heather Dosman (Existential Eating), Food Educator Camille Flanjak (me) and our hilarious guests are donating a portion of the proceeds to the Forest and the Femme.
Tickets for comedy, dinner and a glass of bubbles are $65 including tax and gratuity.
purchase tickets on eventbrite >here<
You know what I'm sick of? Cal-Organic greens. Here in Vancouver, BC, the leaves we get out of the Clamshell in grocery stores as 'Organic Greens' are mass-produced in fertilizer-soaked Californian soil, pale-coloured, bland, and just generally floppy (and even sometimes bad-breathed and slimy). Their yuck factor applies at any time of year but is especially grody and feels desperate in the dead of our slushy, grey PNW winter when our farmer's markets don't provide us with the usual arugula, baby lettuce, and spinach options.
This means it may be time to think outside of the salad box and actually understand what's in season in our mild climate -- if not for the benefit of the environment, then at least for our tastebuds.
So what is delicious, in season, and available locally in the winter for folks in the Pacific Northwest?
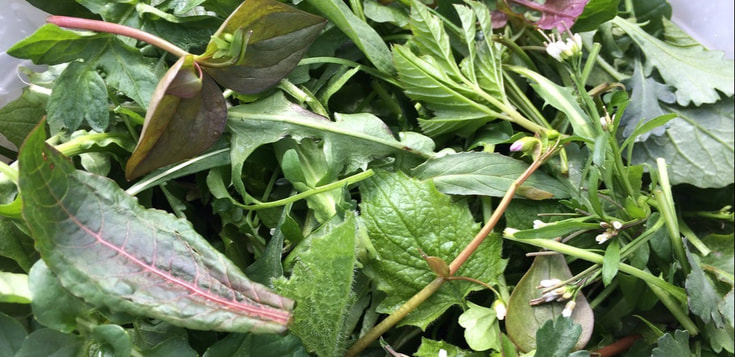
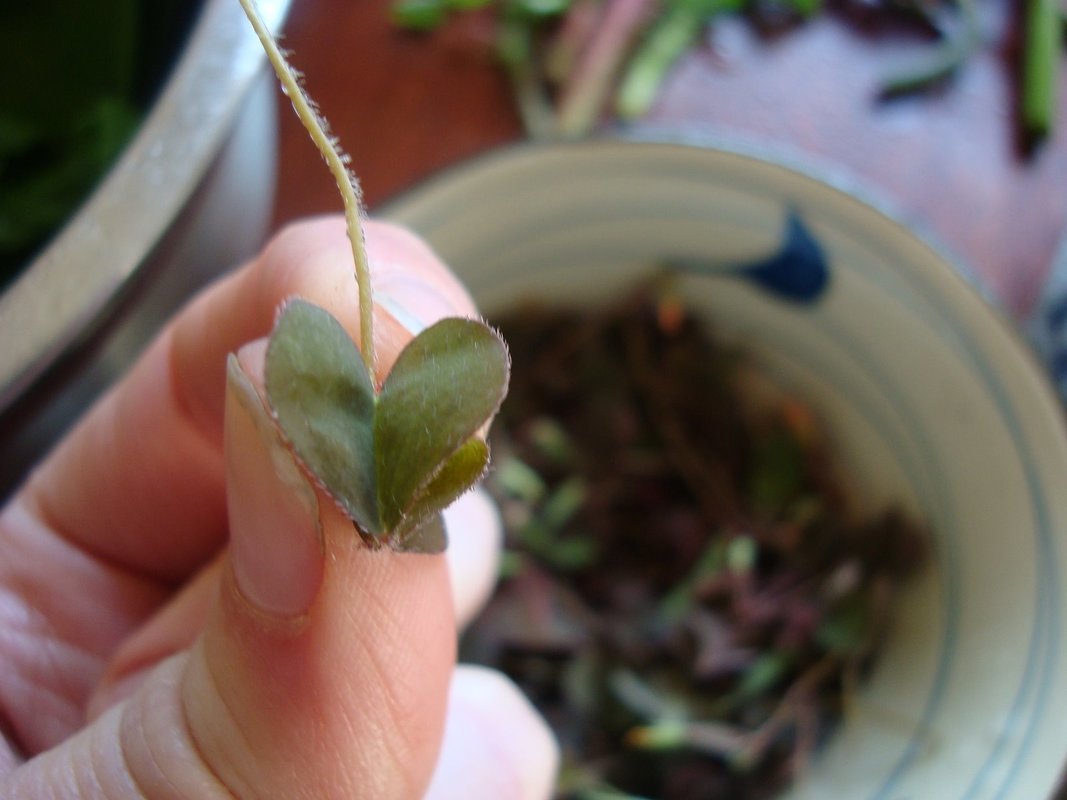
This is a mix of 100% Edge Greens from February, 2016
garden(homegrown or local) Chicory Belgian Endive Radicchio Brussels Sprouts Kale Swiss Chard Fava Bean Foliage Cabbage Mint | kitchen(homemade) mung bean sprouts radish sprouts quinoa sprouts buckwheat sprouts sunflower sprouts window herbs blanched legumes soaked or steamed grains | wild(wild, rogue, or growing as weeds) Dandelion Chickweed Wintercress Cardamine Nipplewort Goutweed (ground elder) Garlic Mustard Primula (primrose) Leaves Cow Parsley Leaves Blanched Nettle leaves Curly / Sour or Yellow Dock Oxeye Daisy |
To learn more about these queer ingredients and bushtreats -- foods that I classify as 'Edge Species' -- visit the Bushtreats page.
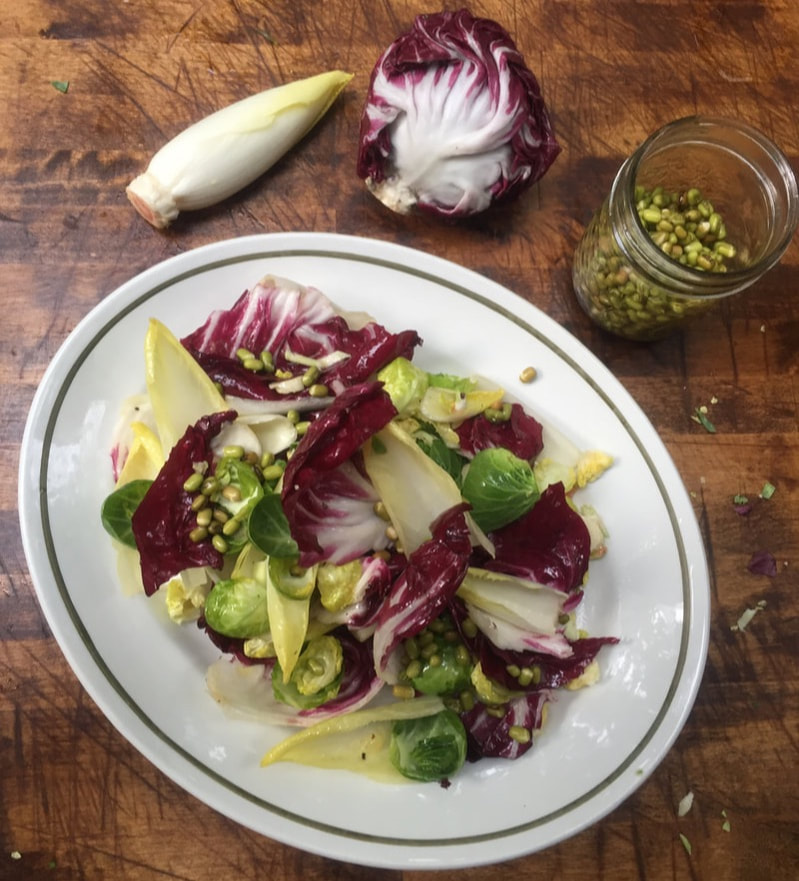
In order to satisfy my relish for fresh greens and to cleanse my liver of the winter (eggnog) habits, I've made it a ritual to enjoy the following dish. It displays a flavour palate similar to bittersweet Campari and really hits the same spots to stimulate digestion and cleanse the blood. Plus, Endive and Radicchio are a pretty classic mix for a winter salad, so you should be able to find them in any grocery store.
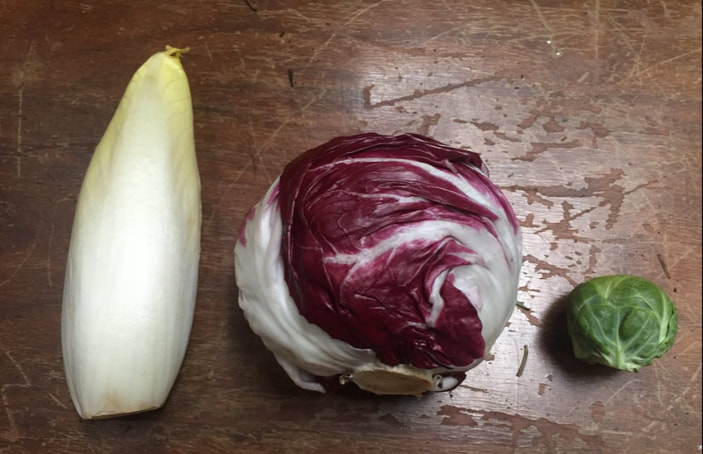
winter greens plate
INGREDIENTS
Greens
2 Belgian Endives
1 head of Radicchio
3 Brussels sprouts
Any sprouts, cooked or soaked grains/legumes you may have (totally optional)
Dressing
1 tbsp citrus juice or locally made vinegar*
1.5 tbsp olive, camellina, or flax oil
salt and pepper
*grapefruit and tangerine is in season not-so-far (California/Florida). For vinegar, you could even make your own... like from old wine or extra sour kombucha.
PROCESS
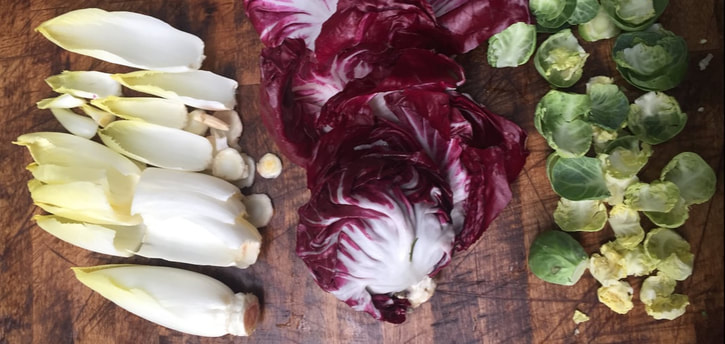
Rip leaves off Brussel sprouts, radicchio, and endives however you like. I like them in big pieces but you could shred them, slice them, or pull them off gently in large, individual leaves as more of a crudité (that's how I've done it in the photos). You might have to keep slicing the base of the brussel sprouts to free the leaves - same goes for the endive.
Toss in citrus juice or vinegar, then salt, then oil, then pepper to top. Sprinkle with sprouts, grains or lentils to serve. In the picture below I've added window sprouted mung beans. I sprouted them in 3 days in the middle of winter and they make me feel like it's spring.
his salad is especially good with fresh shucked oysters, homemade sourdough, and Bella Methode Ancestrale.
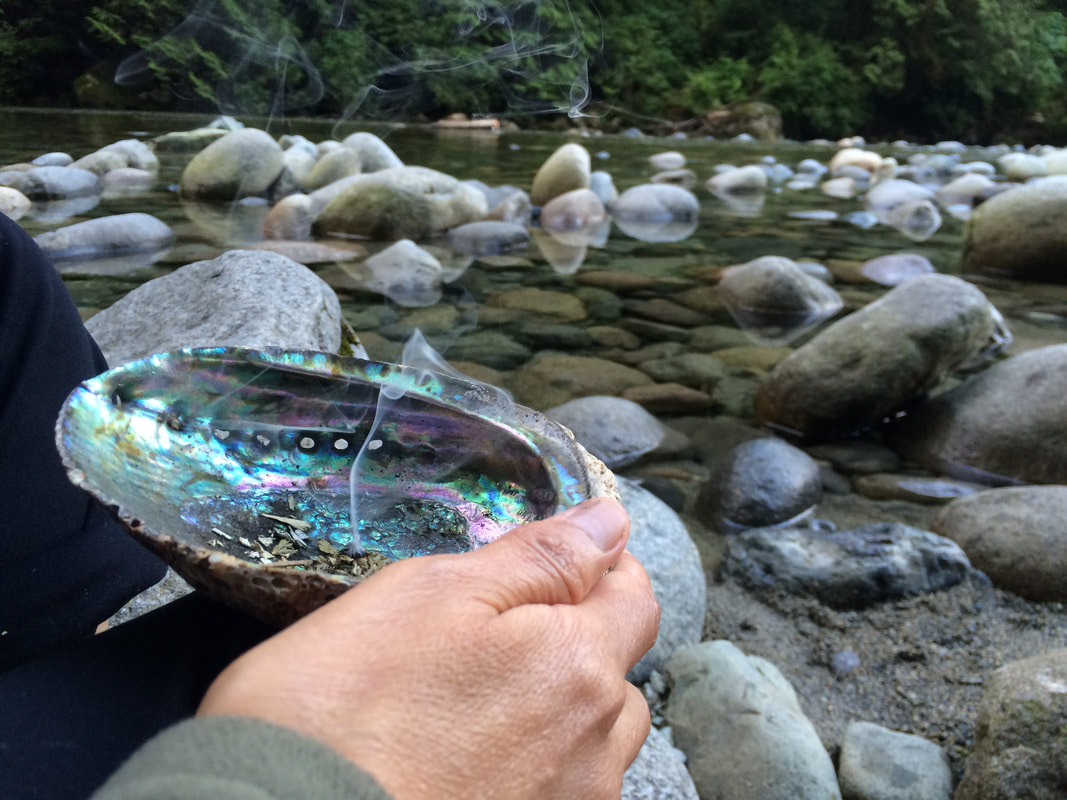
TEA is an amazing way to experience the aromas and memories of the beautiful things we find in the natural world. The powerful stuff of herbs released by way of heat and water is called a 'decoction' in herbal medicine, and is most commonly enjoyed by way of a light, short infusion in what we call teas.
I have a beautiful hutch filled with many potions, infusions, tinctures and dried wild and cultivated herbs I sowed and/or harvested myself. Knowing a plant from seed, seedling, flower, then seed again - and interacting with it by encouraging its growth, plucking it from the soil, consuming, processing and drying it... This is a sensual and intimate process of life and death, growth and decay! If I think about all the lessons I can take from plants I often find myself in fractals of worlds and feelings and pleasure. It's potent shit.
Outside of my existential rumination, drying teas is a tangible process to capture the aroma, nutrition, and beauty of plants and fungi. Here I'll share my tips and tricks to harvesting and drying teas.
preparation
- Harvest or purchase (direct from harvesters or farmers) high-quality and super fresh stuff
- Choose the most interesting, beautiful, medicinal, and aromatic things
- Ingredients can include but are not limited to: herbs, flowers, mushrooms, fruit, or even bark(!)
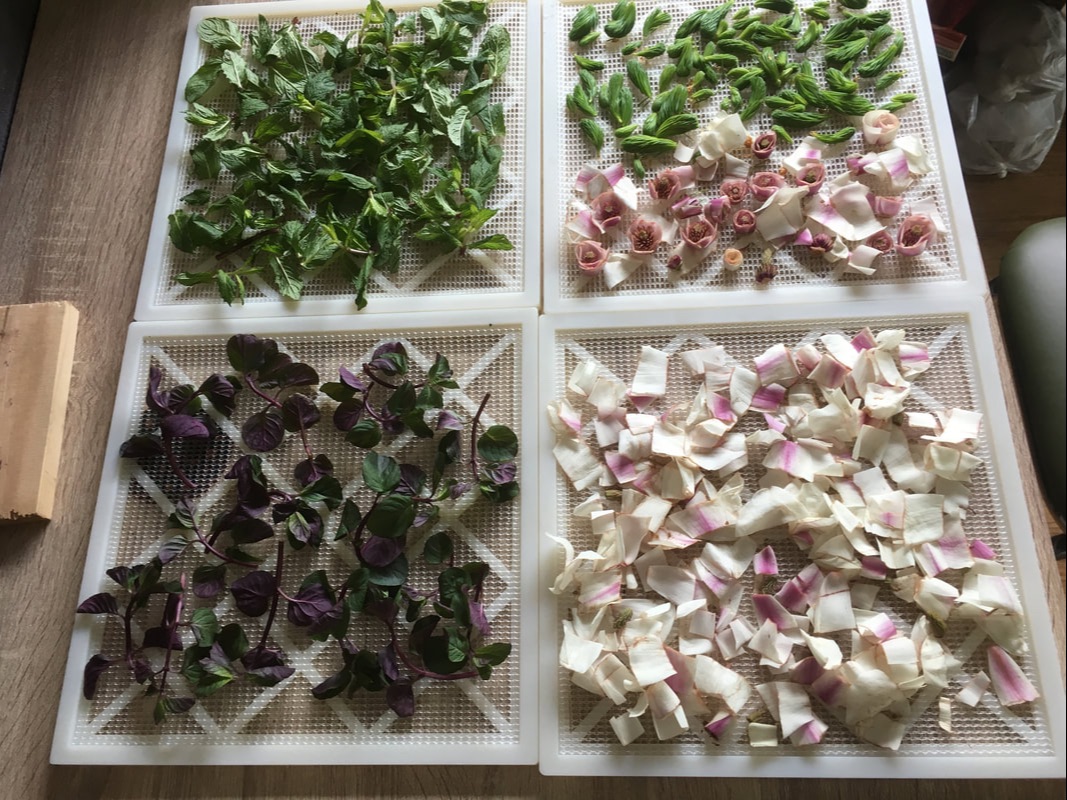
- Keep everything as pristine as possible and rinse them when necessary. See the notes below on each type of ingredient and how to keep them clean.
dehydrate
DRY your ingredients using any of the following methods:
- gently: tie ingredients with a needle and string and hang in dark places with good ventilation
- quicker: utilize the hot sun in summer: lay flat on a tray with a tea towel or paper towel under the ingredients to absorb excess moisture if necessary. be sure to move your tray inside if the weather changes from dry to moist!
- in the oven: on the lowest temperature and the door ajar (this is my least preferred method because the heat can damage the quality of your ingredients)
- dehydrator: the fastest and most efficient method if you are privileged enough to own this machine. Use the correct setting for your ingredients ie. harder ingredients like conk mushrooms and roots need a higher setting (like for jerky) and leaves or flowers would be the gentlest setting (like for herbs).
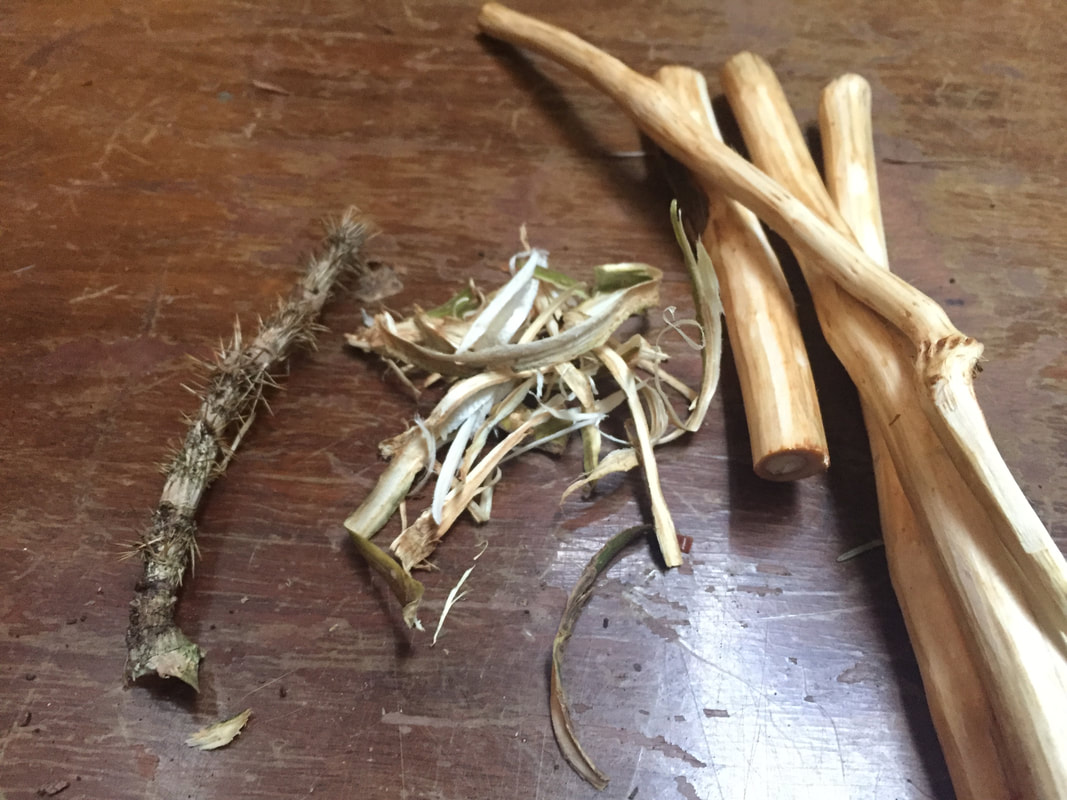 Scrub roots completely clean of dirt. Many roots and sticks like Devil's Club and Oregon grape have a potent inner bark (cambium) while heartwood may lack aroma or flavour. Devil's club spines and outer bark must be scraped off before processing into strips for tea. Research your ingredients well and prepare them accordingly. | 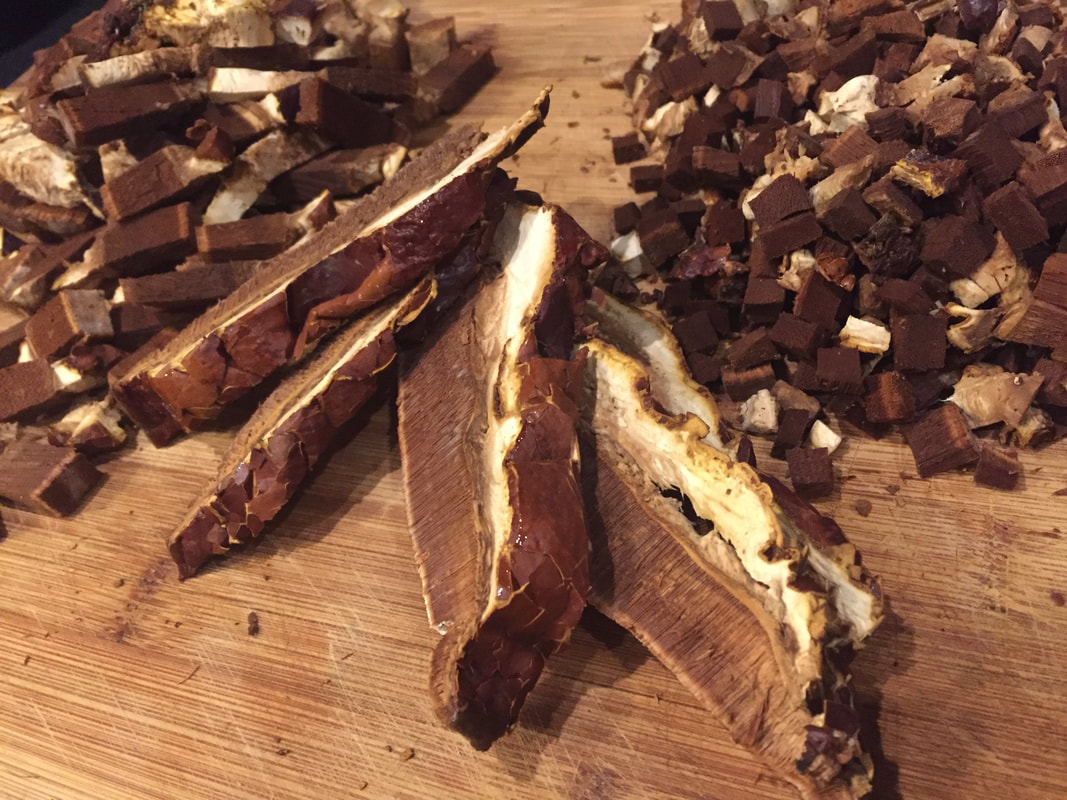 Brush mushrooms totally bare (don't run under water as this will make them harder to dry). Medicinal conks need to be processed immediately after harvesting or they will be too hard to cut. Ensure you dehydrate them thoroughly lest they sporelate or grow mold in your tea blends! | 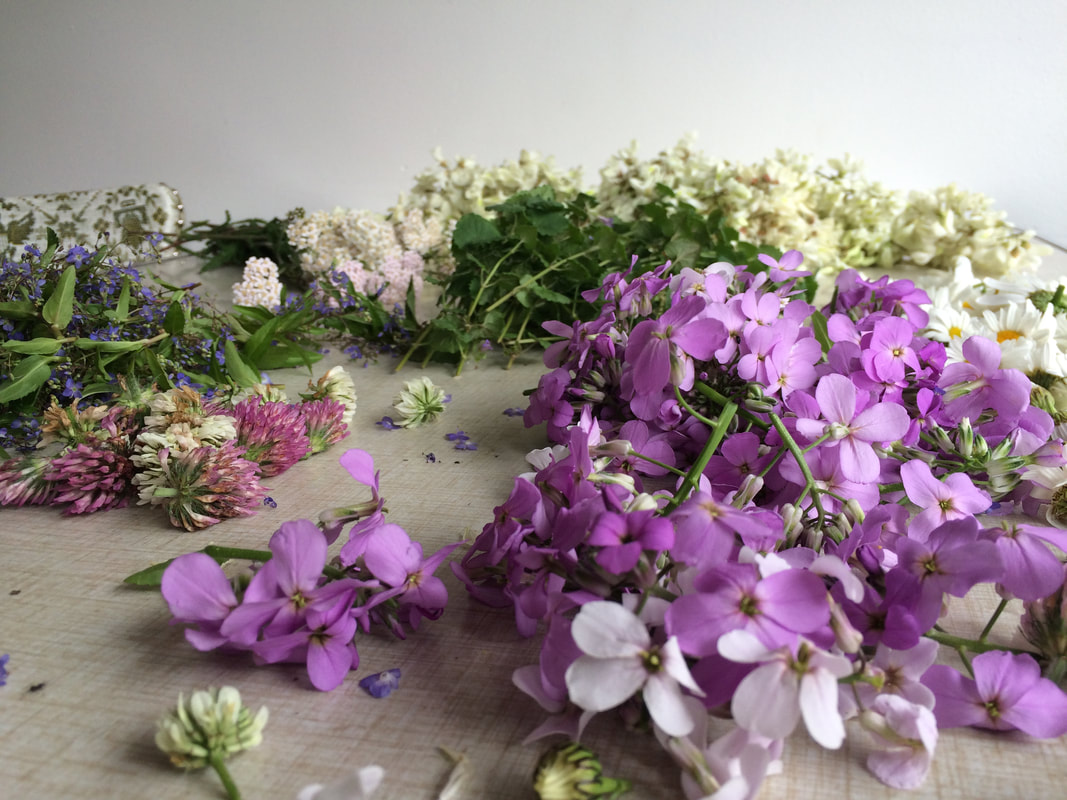 For flowers and leaves, avoid contact with anything mucky to keep them clean and dry so you don't have to run them under water. If they are gritty, clean them with fresh, cold, running water, dry completely, and store in the fridge until you are ready to dehydrate them. |
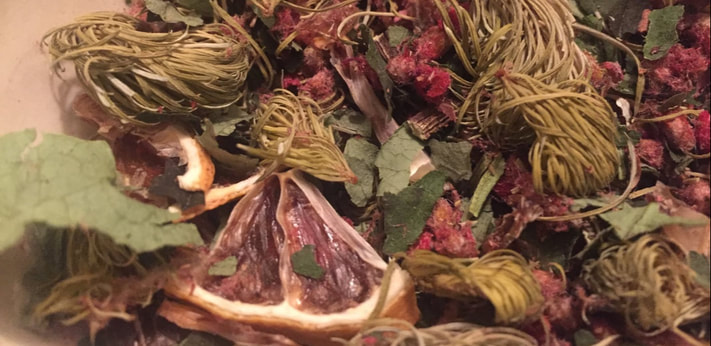
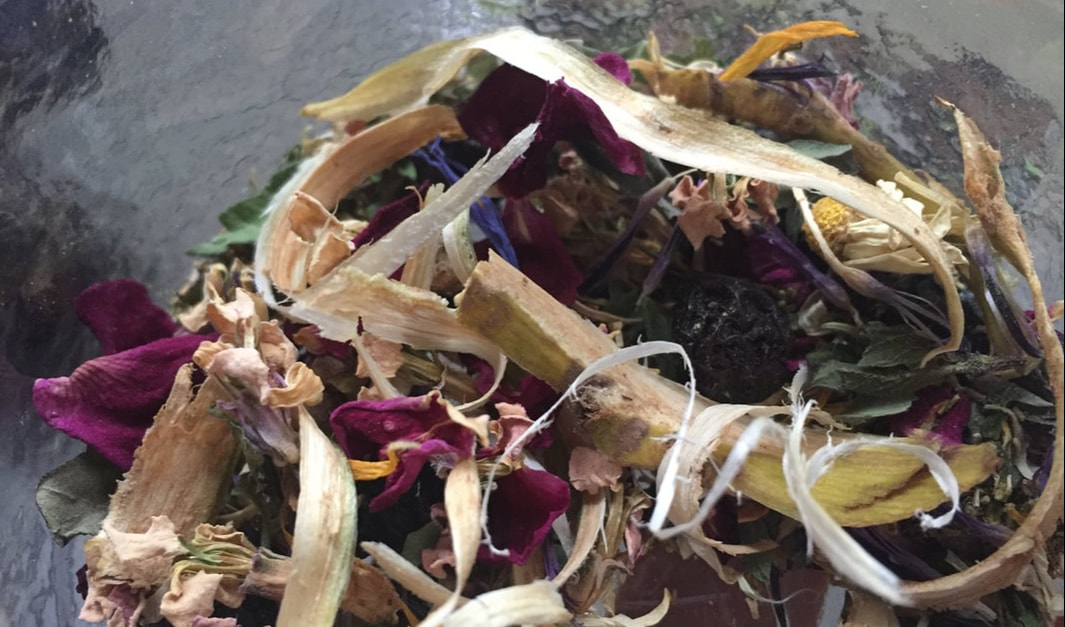
This tea blend is tangy, nutritious, and a lovely kick for a cold. All the ingredients I hand-harvested save for the citrus which I sliced and dried myself.
As always, tea blending is such a personal experience - I encourage you to add or substitute ingredients for other vitamin C-rich things that you can harvest from wilds or edges like wild cherry, mullein, and willow bark.
As always, tea blending is such a personal experience - I encourage you to add or substitute ingredients for other vitamin C-rich things that you can harvest from wilds or edges like wild cherry, mullein, and willow bark.
 | 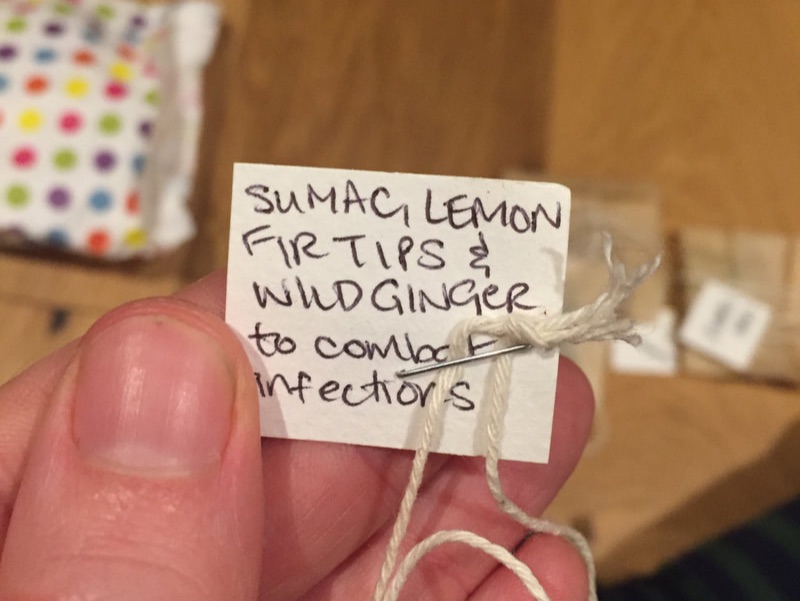 |
Vitamin C Boost Tea
INGREDIENTS
1 tbsp sumac flowers (I used a mixture of smooth and stag horn varieties)
3 wheels of dried citrus
1 tbsp dried fir tips
1 tbsp dried wild ginger leaves (Asarum Species)
PROCESS
I used a mortar and pestle to crumble the ingredients together and release their aromas. Oh man, it smelled so good. Steep 1 tea ball's worth in a cup of hot water for 3 minutes. I like to leave the tea in the water while I drink so it continues to extract nutrition and flavour. Sweeten with honey if desired.
Camille
forest brat, plant muncher, mushroom dweller
Search
(scroll down after searching to skip the ads)
Archives
October 2019
March 2018
February 2018
January 2018
 RSS Feed
